An intro to git & GitHub for version control and collaboration
Pre-workshop prep
Please work through the following installations and configurations before attending the workshop (note: If you’ve already taken ESM 206, you’ve likely completed Steps 1–3 and can skip ahead to Step 4):
NoteInstallation instructions (collapsed to save space)
1. Install R
Download the latest version of R for your operating system at cloud.r-project.org. If you already have R installed, simply reinstall to update.
2. Install Positron
While R is a programming language, Positron is a software application (often referred to as an IDE, Integrated Development Environment) that provides a user-friendly workspace for writing and running code. In addition to R, Positron also supports Python and other programming languages, making it a flexible tool for data science and scientific computing. If you’ve used RStudio in the past, you’ll notice a lot of similar features in Positron (it was created by the company behind RStudio, Posit), as well as improved support for multiple languages and newer development tools.
To install Positron, visit positron.posit.co/install and follow the instructions. If you already have Positron installed, it’ll automatically check for updates from Posit’s channel of monthly releases and install the new version in the background. To open Positron, click on the app logo that looks like:

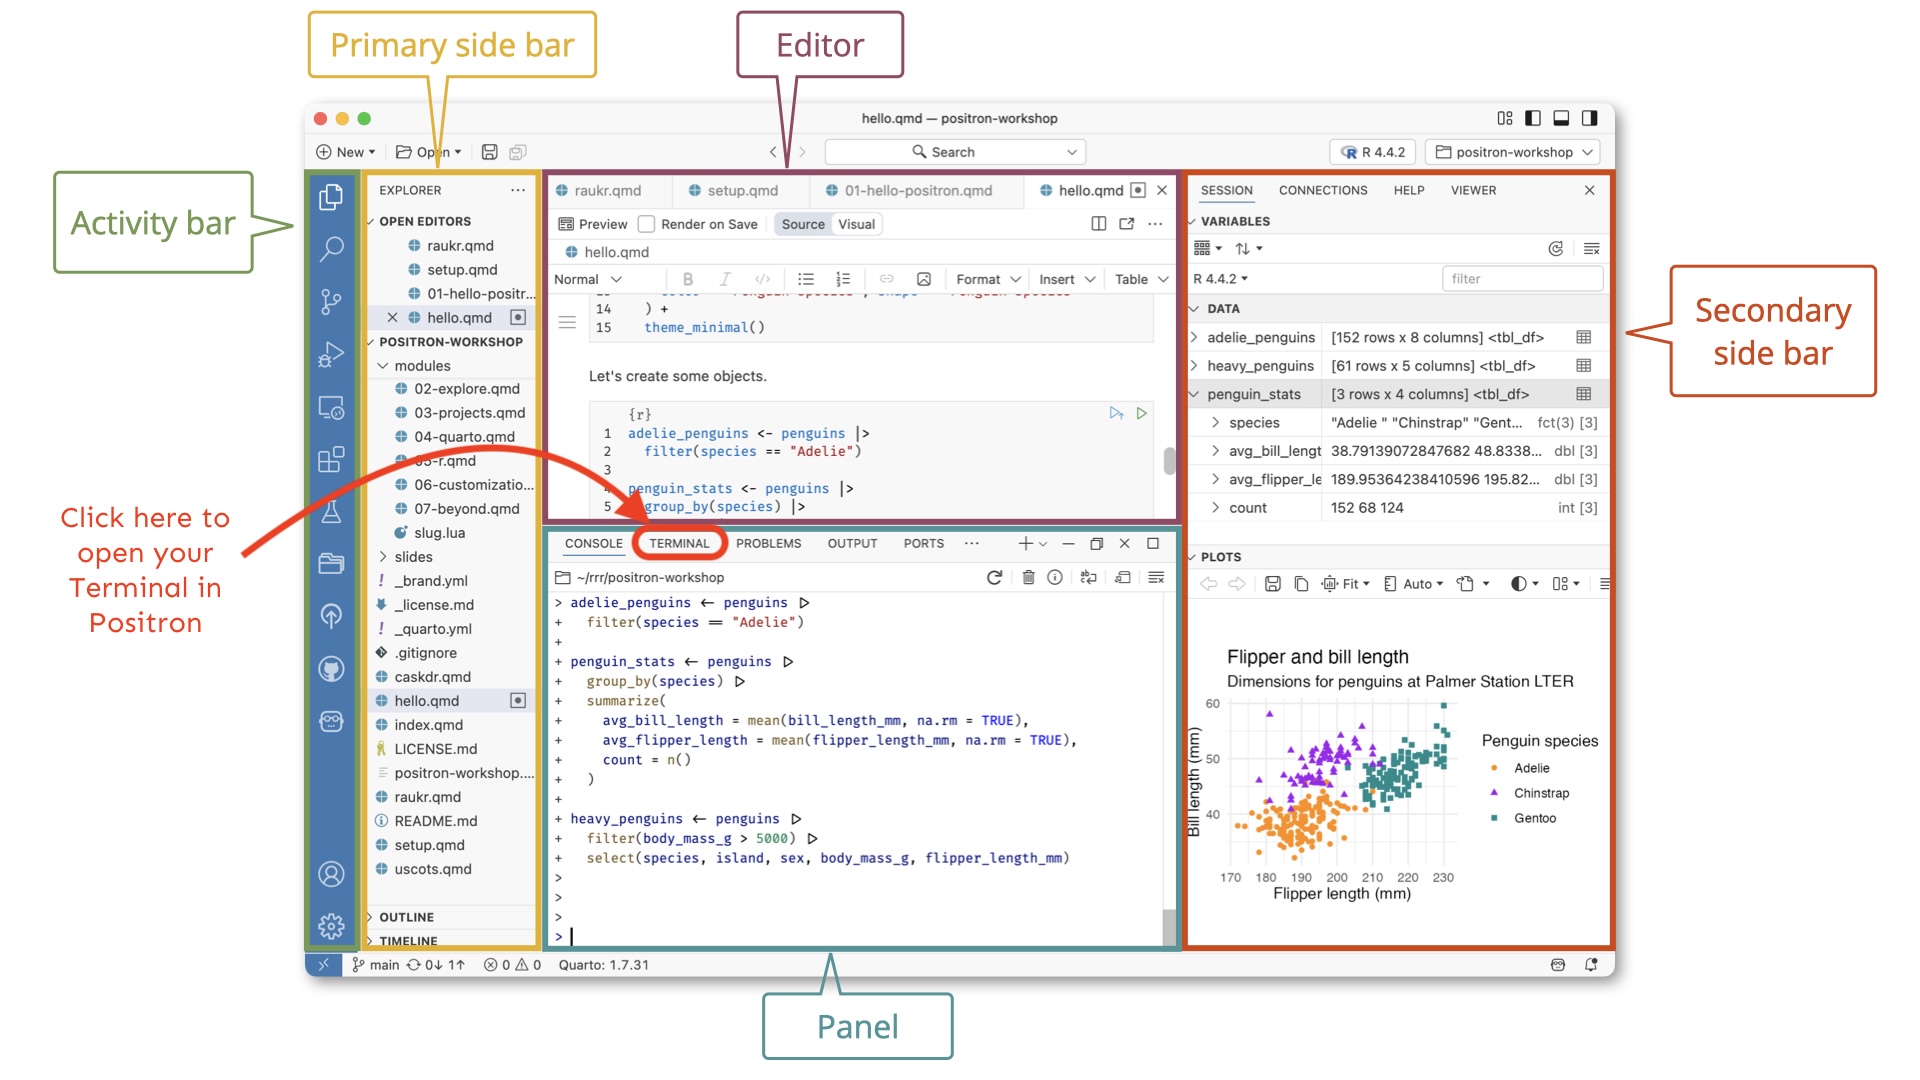
Several of the following installation steps will ask you to run commands in the Positron Terminal. You can find it next to the Console in Positron’s Panel (bottom center of the IDE):
3. (Mac users only) Install Command Line Tools & XQuartz
Mac users should install the following tools, which are required for some R package installations:
- Command Line Tools: Run
xcode-select --installin the Positron Terminal - XQuartz: Download from xquartz.org
Windows users: Command Line Tools are pre-installed and XQuartz is not required.
4. Create a GitHub account
GitHub is a cloud-based platform where data scientists and developers can store, share, and collaborate on code. If you don’t already have a GitHub account, go to https://github.com and create one. Check out Jenny Bryan’s Happy Git with R, Ch. 4 for some helpful considerations when choosing a username. We suggest that you use a personal email, rather than a school or work email (which may become deactivated after you graduate or change jobs).
5. Check for git
Git is a version control system that lives on our local computer(s) and is used to track and manage changes to files (mostly source code). You should already have git on your device, but let’s check for it anyway.
- Open Positron. In the Terminal, run the following command (choose the option for your operating system):
Positron Terminal
which gitPositron Terminal
where git- If you get something that looks like a file path to git on your computer (e.g.
/usr/local/bin/giton a Mac,C:\Program Files\Git\mingw64\bin\git.exeon Windows, though it could differ slightly on your computer), then you have git installed. If you instead get no response at all, you should download & install git here: git-scm.com/downloads
6. Configure git
- Open Positron. In the Terminal, run the following commands (by pressing enter/return after each line). Be sure to replace the username (keep the quotation marks!) with your GitHub username and the email with the email you used for your GitHub account.
Positron Terminal
git config --global user.name "Jane Doe"
git config --global user.email janedoe@example.com- Then, in the Terminal run the following, and carefully check that the name and email returned match your GitHub information:
Positron Terminal
git config --list --global7. Store your GitHub personal access token (PAT)
First: What even is a personal access token? From GitHub’s documentation:
Personal access tokens (PATs) are an alternative to using passwords for authentication to GitHub when using the GitHub API or the command line.
This means that in order to push your work (files, scripts, etc.) from your laptop (or any other computer) to GitHub, you’ll need to first to generate a PAT. Importantly, you’ll need to generate a PAT for each computer you wish to work from. For example, we will complete the following steps to create a PAT for your personal laptop, but you’ll also need to create a PAT if/when you choose to work on a second computer at home or any of the Bren servers. Good news is that you can follow these same steps when you’re ready to set up additional PATs on other machines. For now, let’s get a PAT for our personal laptop squared away:
- Install the
{usethis}package in R by running the following in the Positron Console:
Positron Console
install.packages(“usethis”)
TipHeads-up: If you copy-paste this code, you may get an error.
Some documents convert straight quotes (") into curly “smart quotes” that R won’t recognize. If that happens, retype the quote marks by hand.
- Run the following in the Positron Console to launch GitHub in your web browser:
Positron Console
usethis::create_github_token() - Enter your GitHub password if/when prompted. You’ll be taken to a page that looks similar to this:
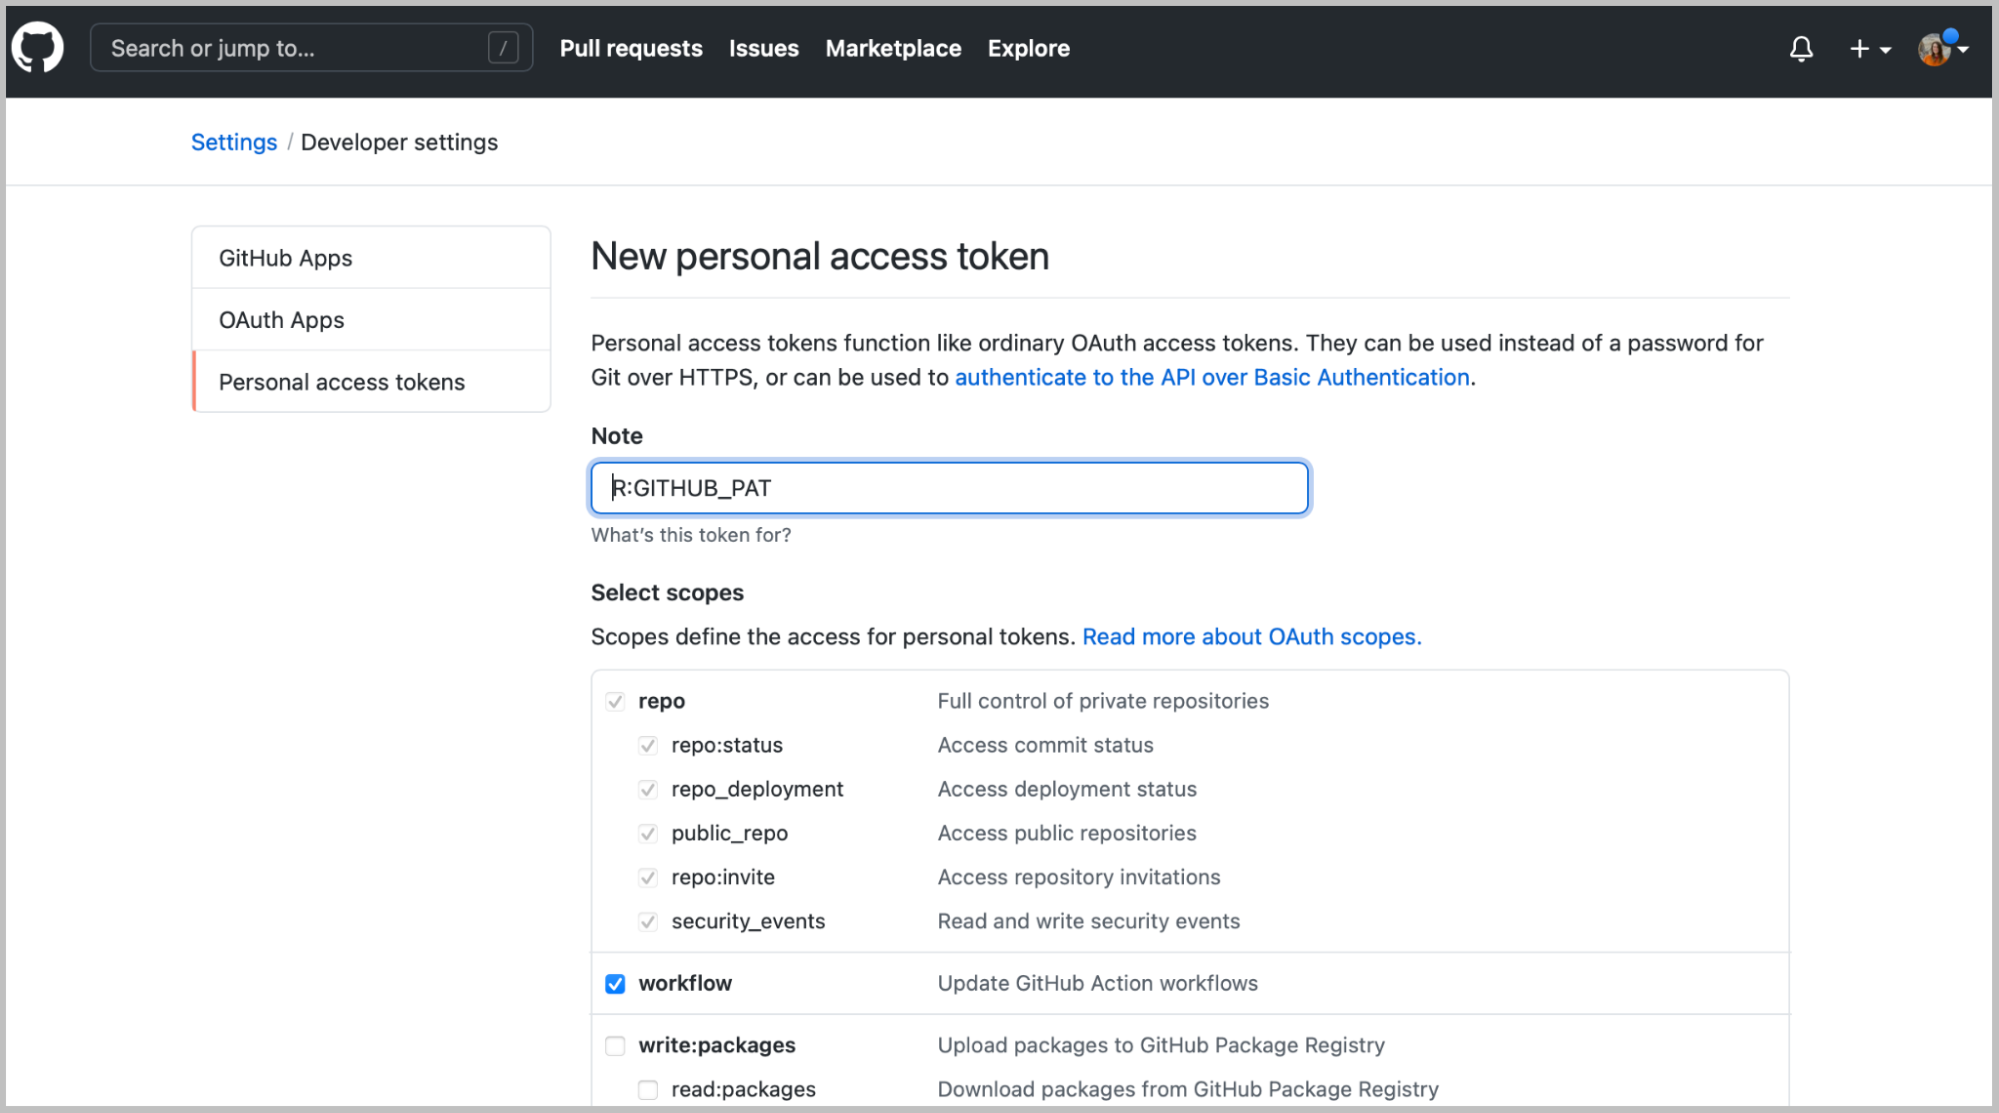
In the Note field, you should see some autopopulated text:
R:GITHUB_PAT. We suggest changing this to something that signifies what machine it’s being used for. For example, if you are generating a PAT for your laptop, you might choose to rename it,My Personal Laptop.Next, you’ll see a section called Select scopes with reasonable options already selected for you. Do not change anything. Just scroll down to the bottom of that page and click the green Generate token button:
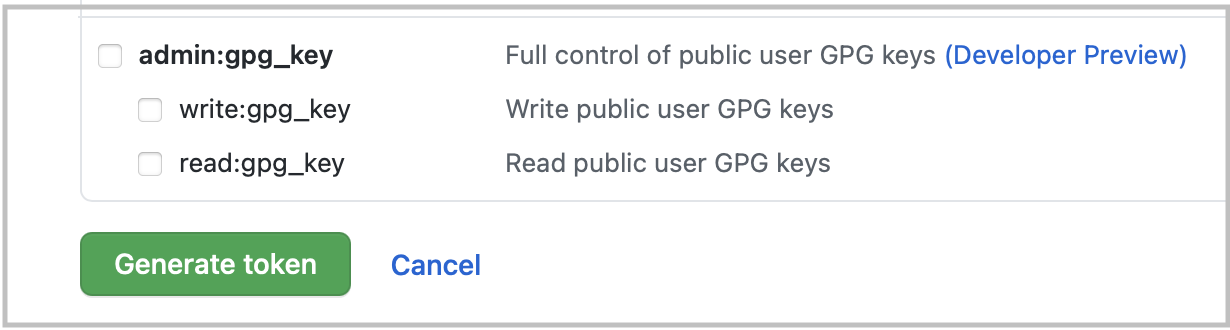
Copy the generated PAT to your clipboard
Back in Positron, run the following in the Console, which will prompt you to paste the PAT you just copied from GitHub. Paste the PAT, press Enter to run. You should see something like this show up if all is well so far (you’ll have pasted your PAT where the example below says “REDACTED”):
Positron Console
gitcreds::gitcreds_set()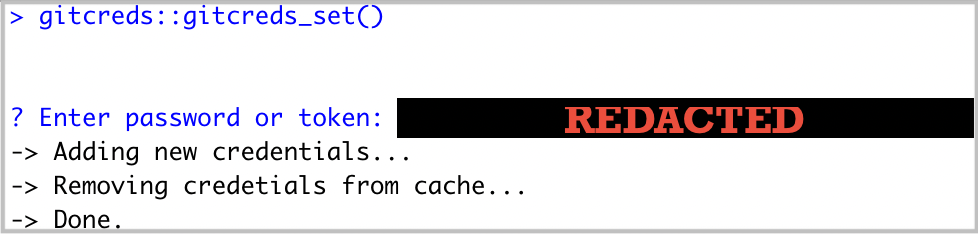
- In the Positron Console, run the following code. Does it return information about your connected GitHub account that looks something like the screenshot below? Great! You’ve configured git and successfully stored your PAT:
Positron Console
usethis::git_sitrep()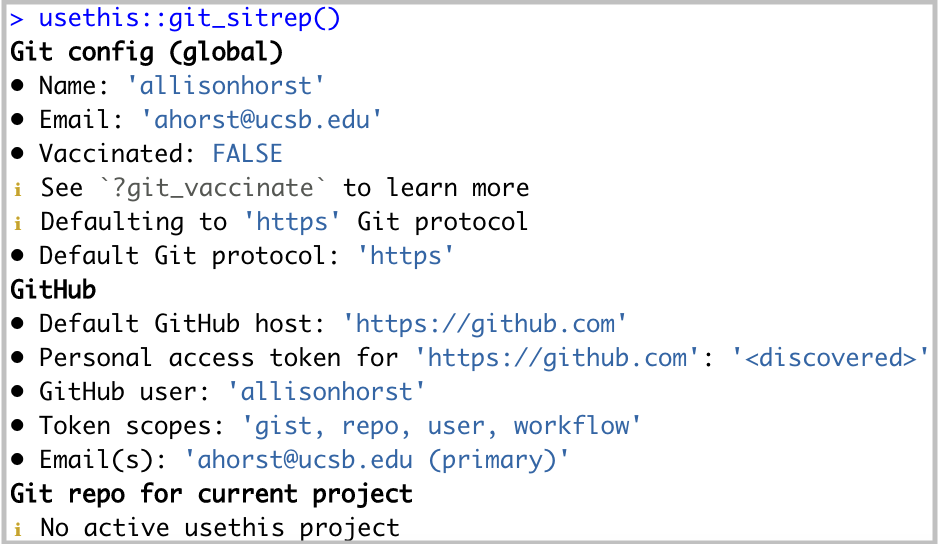
NoteA note on expiring tokens:
Setting an expiration date on personal access tokens is highly recommended in order to keep your information secure. GitHub will send you an email when it’s time to regenerate a token that’s about to expire. Follow the email prompts, then use gitcreds::gitcreds_set() to reset your token.
Intro slides
We’ll start by familiarizing ourselves with some important terminology and concepts. You can access the Google Slides below:
Contribute
Have suggestions for improving these materials? File an issue on GitHub.