Image Source: Reddit

A dashboard is only as good as the data pipeline that feeds it! You should focus most of your energy on your analytics / crafting effective data visualizations.
Related to the point above, remember that it’s easiest if we do all our data wrangling / visualization outside of the shiny framework first, before making it reactive. I recommend you continue to adopt this approach as you embark on your Capstones / GPs / projects. Ultimately, those parts are the most difficult / time-consuming / challenging to get right.
Shiny apps are difficult to maintain – they often require skilled IT personnel to deploy them onto servers, and are prone to breaking with updates to server infrastructure. Have a maintenance plan in place (including a plan for who will maintain / update the code base).
Consider if reactivity allows for insights that you can’t provide using alternative tools / formats, which may be easier to maintain.
htmlwidgets allow you to create interactive data visualizations using JavaScript libraries in R. They can be embedded into Shiny apps (recall we used both the {DT} package to create an interactive datatable and the {leaflet} package to create an interactive map), or into RMarkdown and Quarto Markdown reports. A well-designed reproducible report with interactive widgets is powerful, easier to maintain, and can be deployed on the web (for free) using tools like GitHub pages. Explore 130 registered widgets on the htmlwidget gallery.
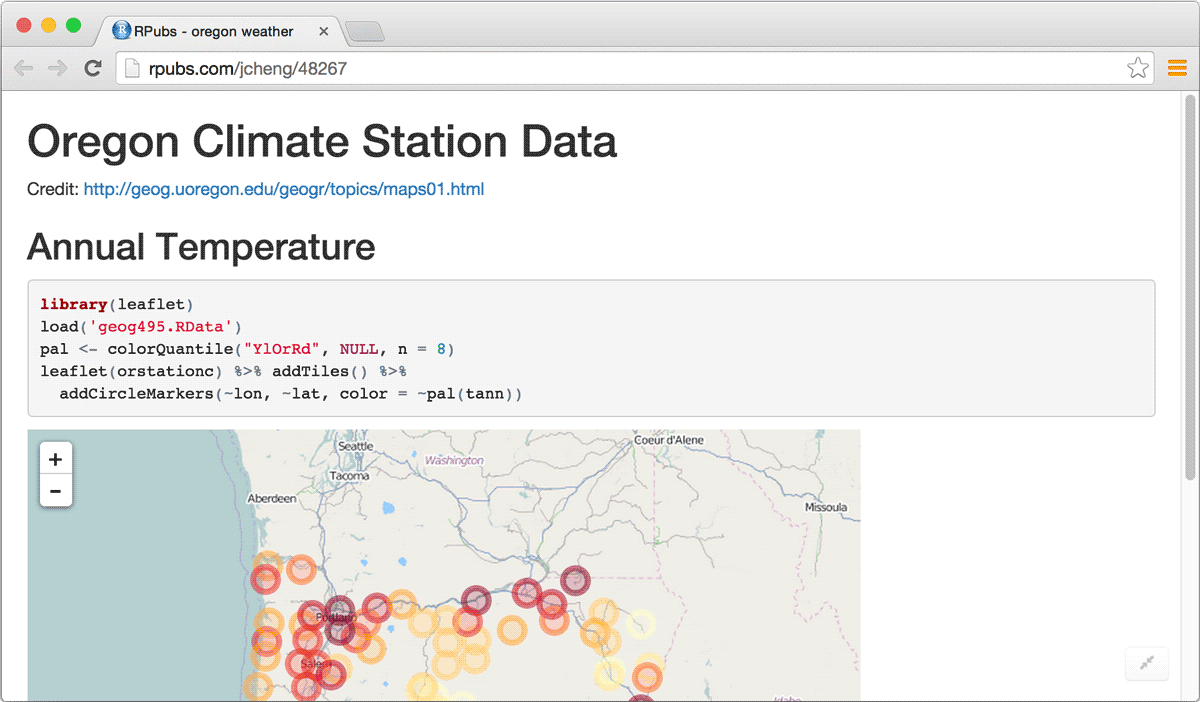
An example leaflet map embedded in an RMarkdown report. Image Source: htmlwidgets for R
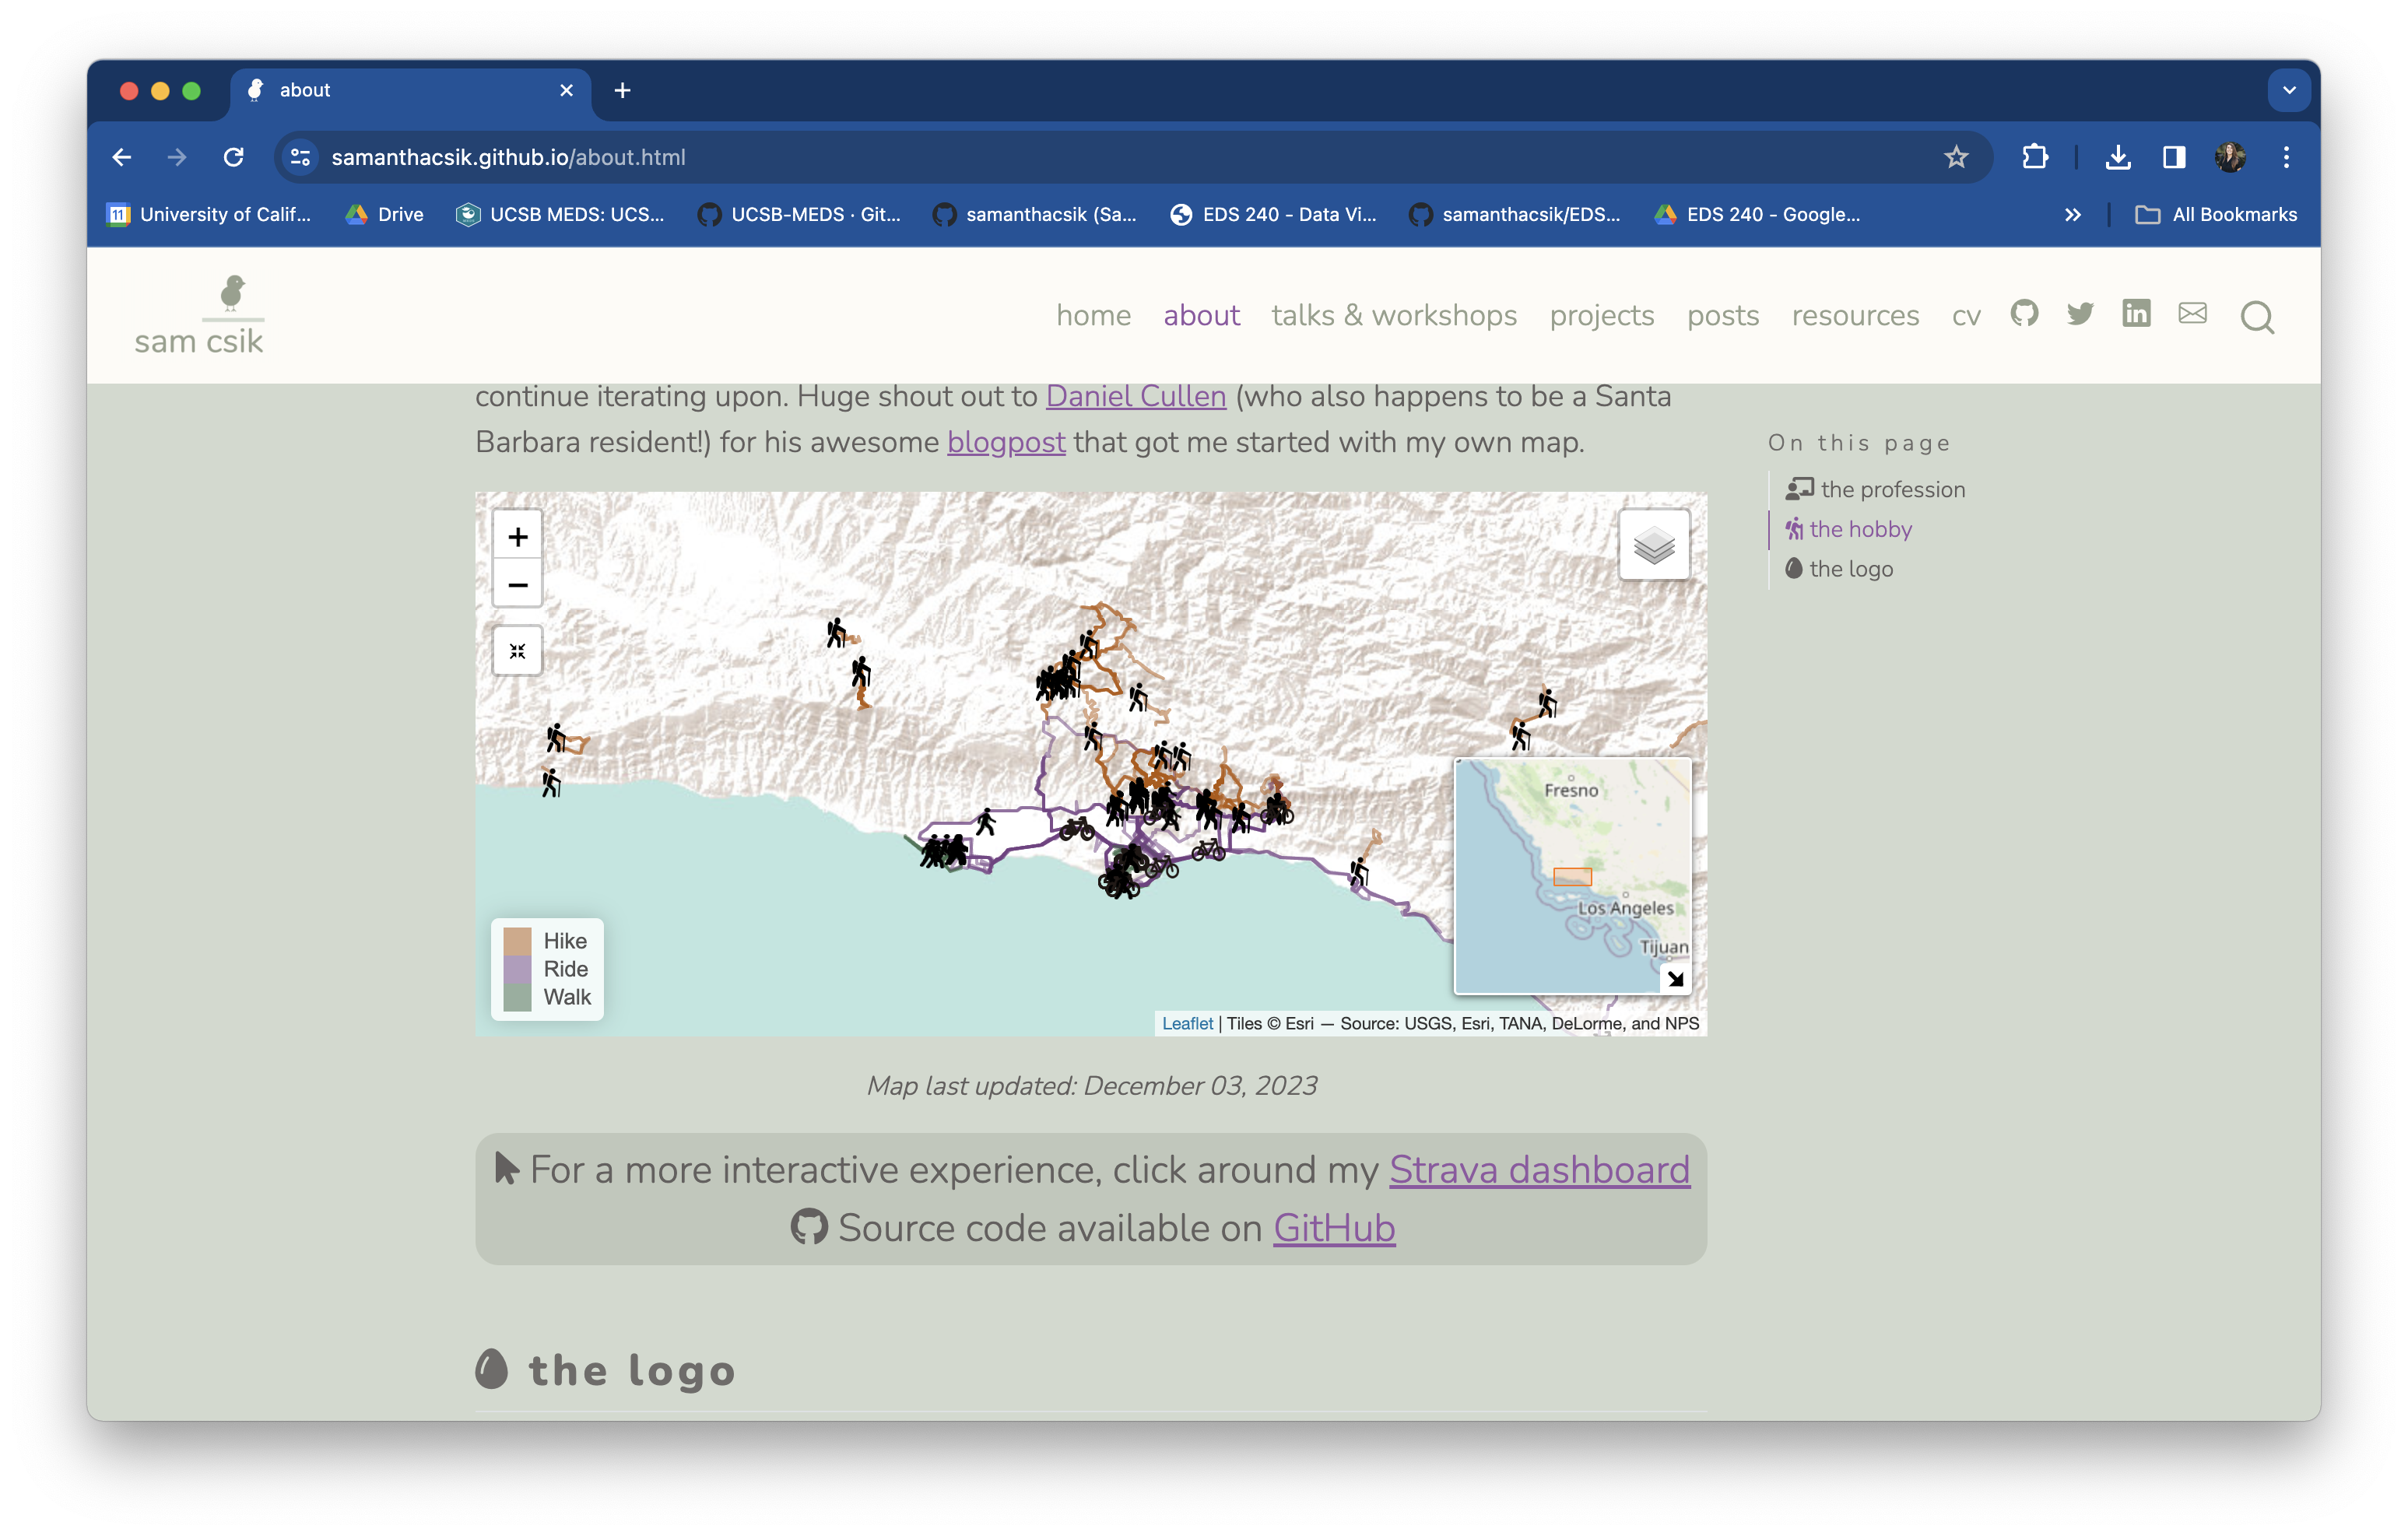
An example leaflet map embedded in a Quarto website. Image Source: my website
Have lots of interactive htmlwidgets to present? Consider composing multiple widgets into a dashboard using {flexdashboard} (based in RMarkdown) or Quarto dashboard. Both frameworks support UI layouts similar to those achieved using {shiny} / {shinydashboard} (columns, rows, tabsets, navbars, value boxes etc.). You can also optionally use Shiny to embed reactive outputs. Check out the {flexdashboard} gallery and Quarto dashboard gallery for examples and source code.
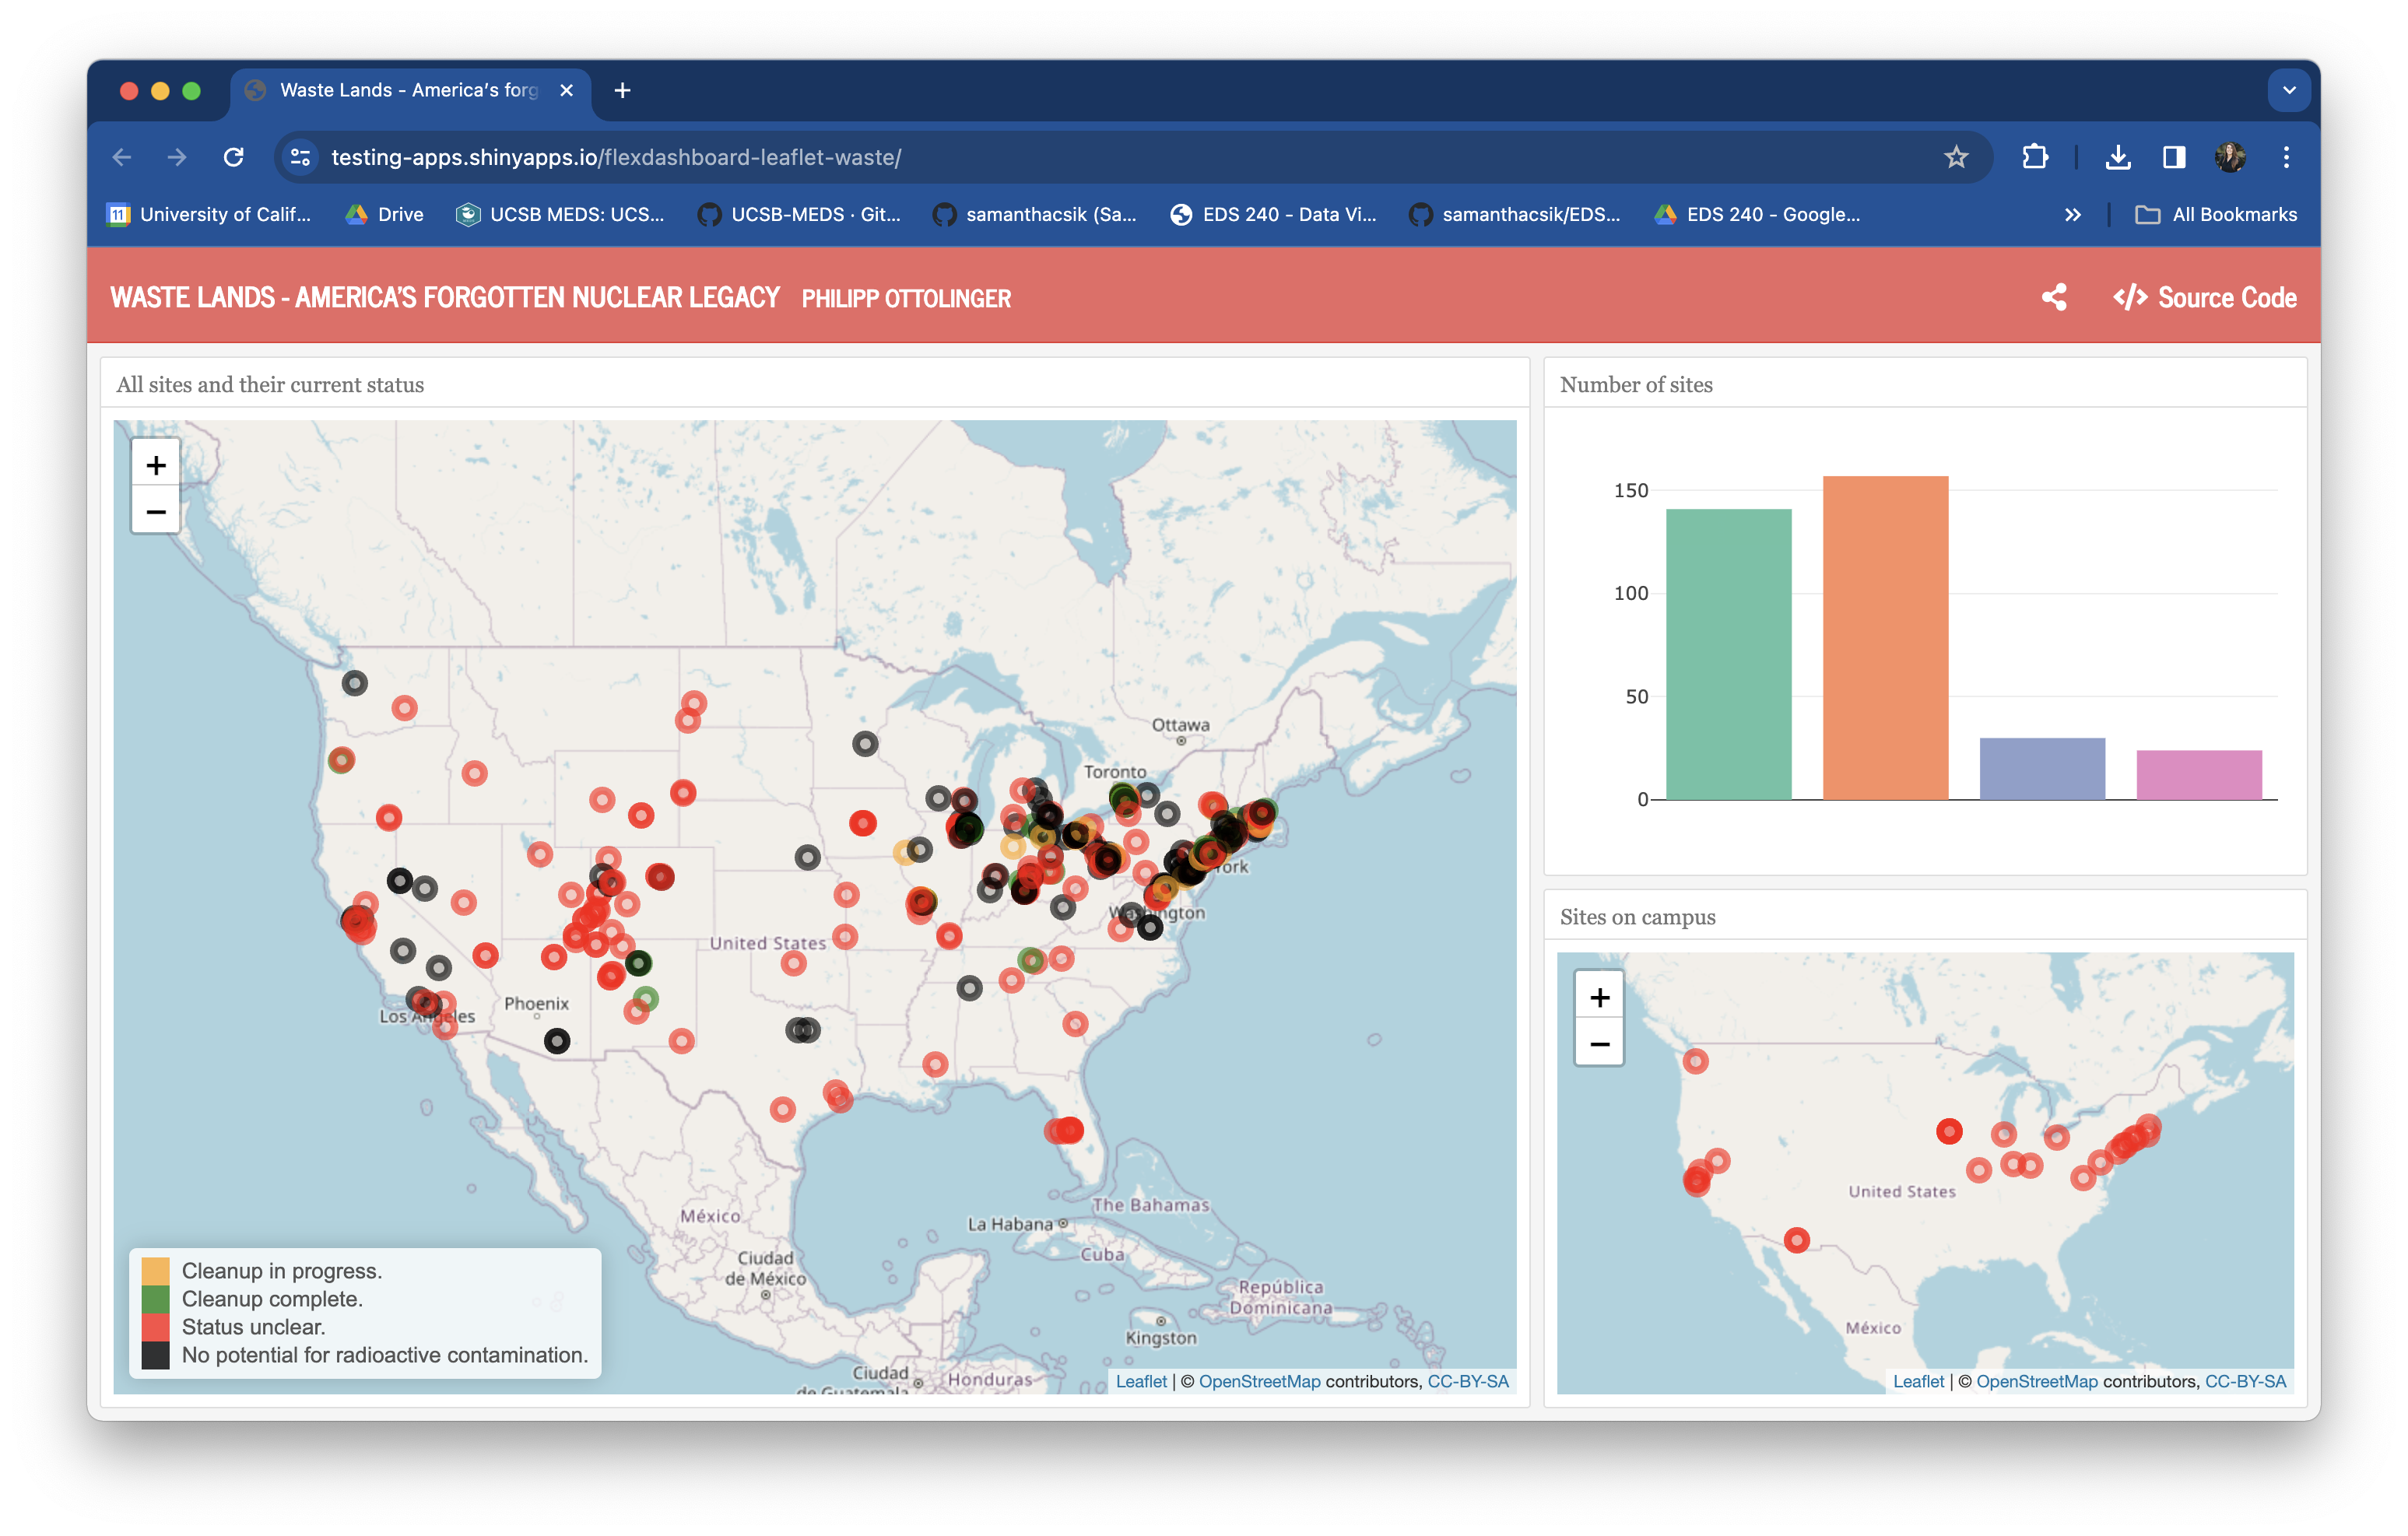
Waste Lands - America’s Forgotten Nuclear Legacy, (built using {flexdashboard})
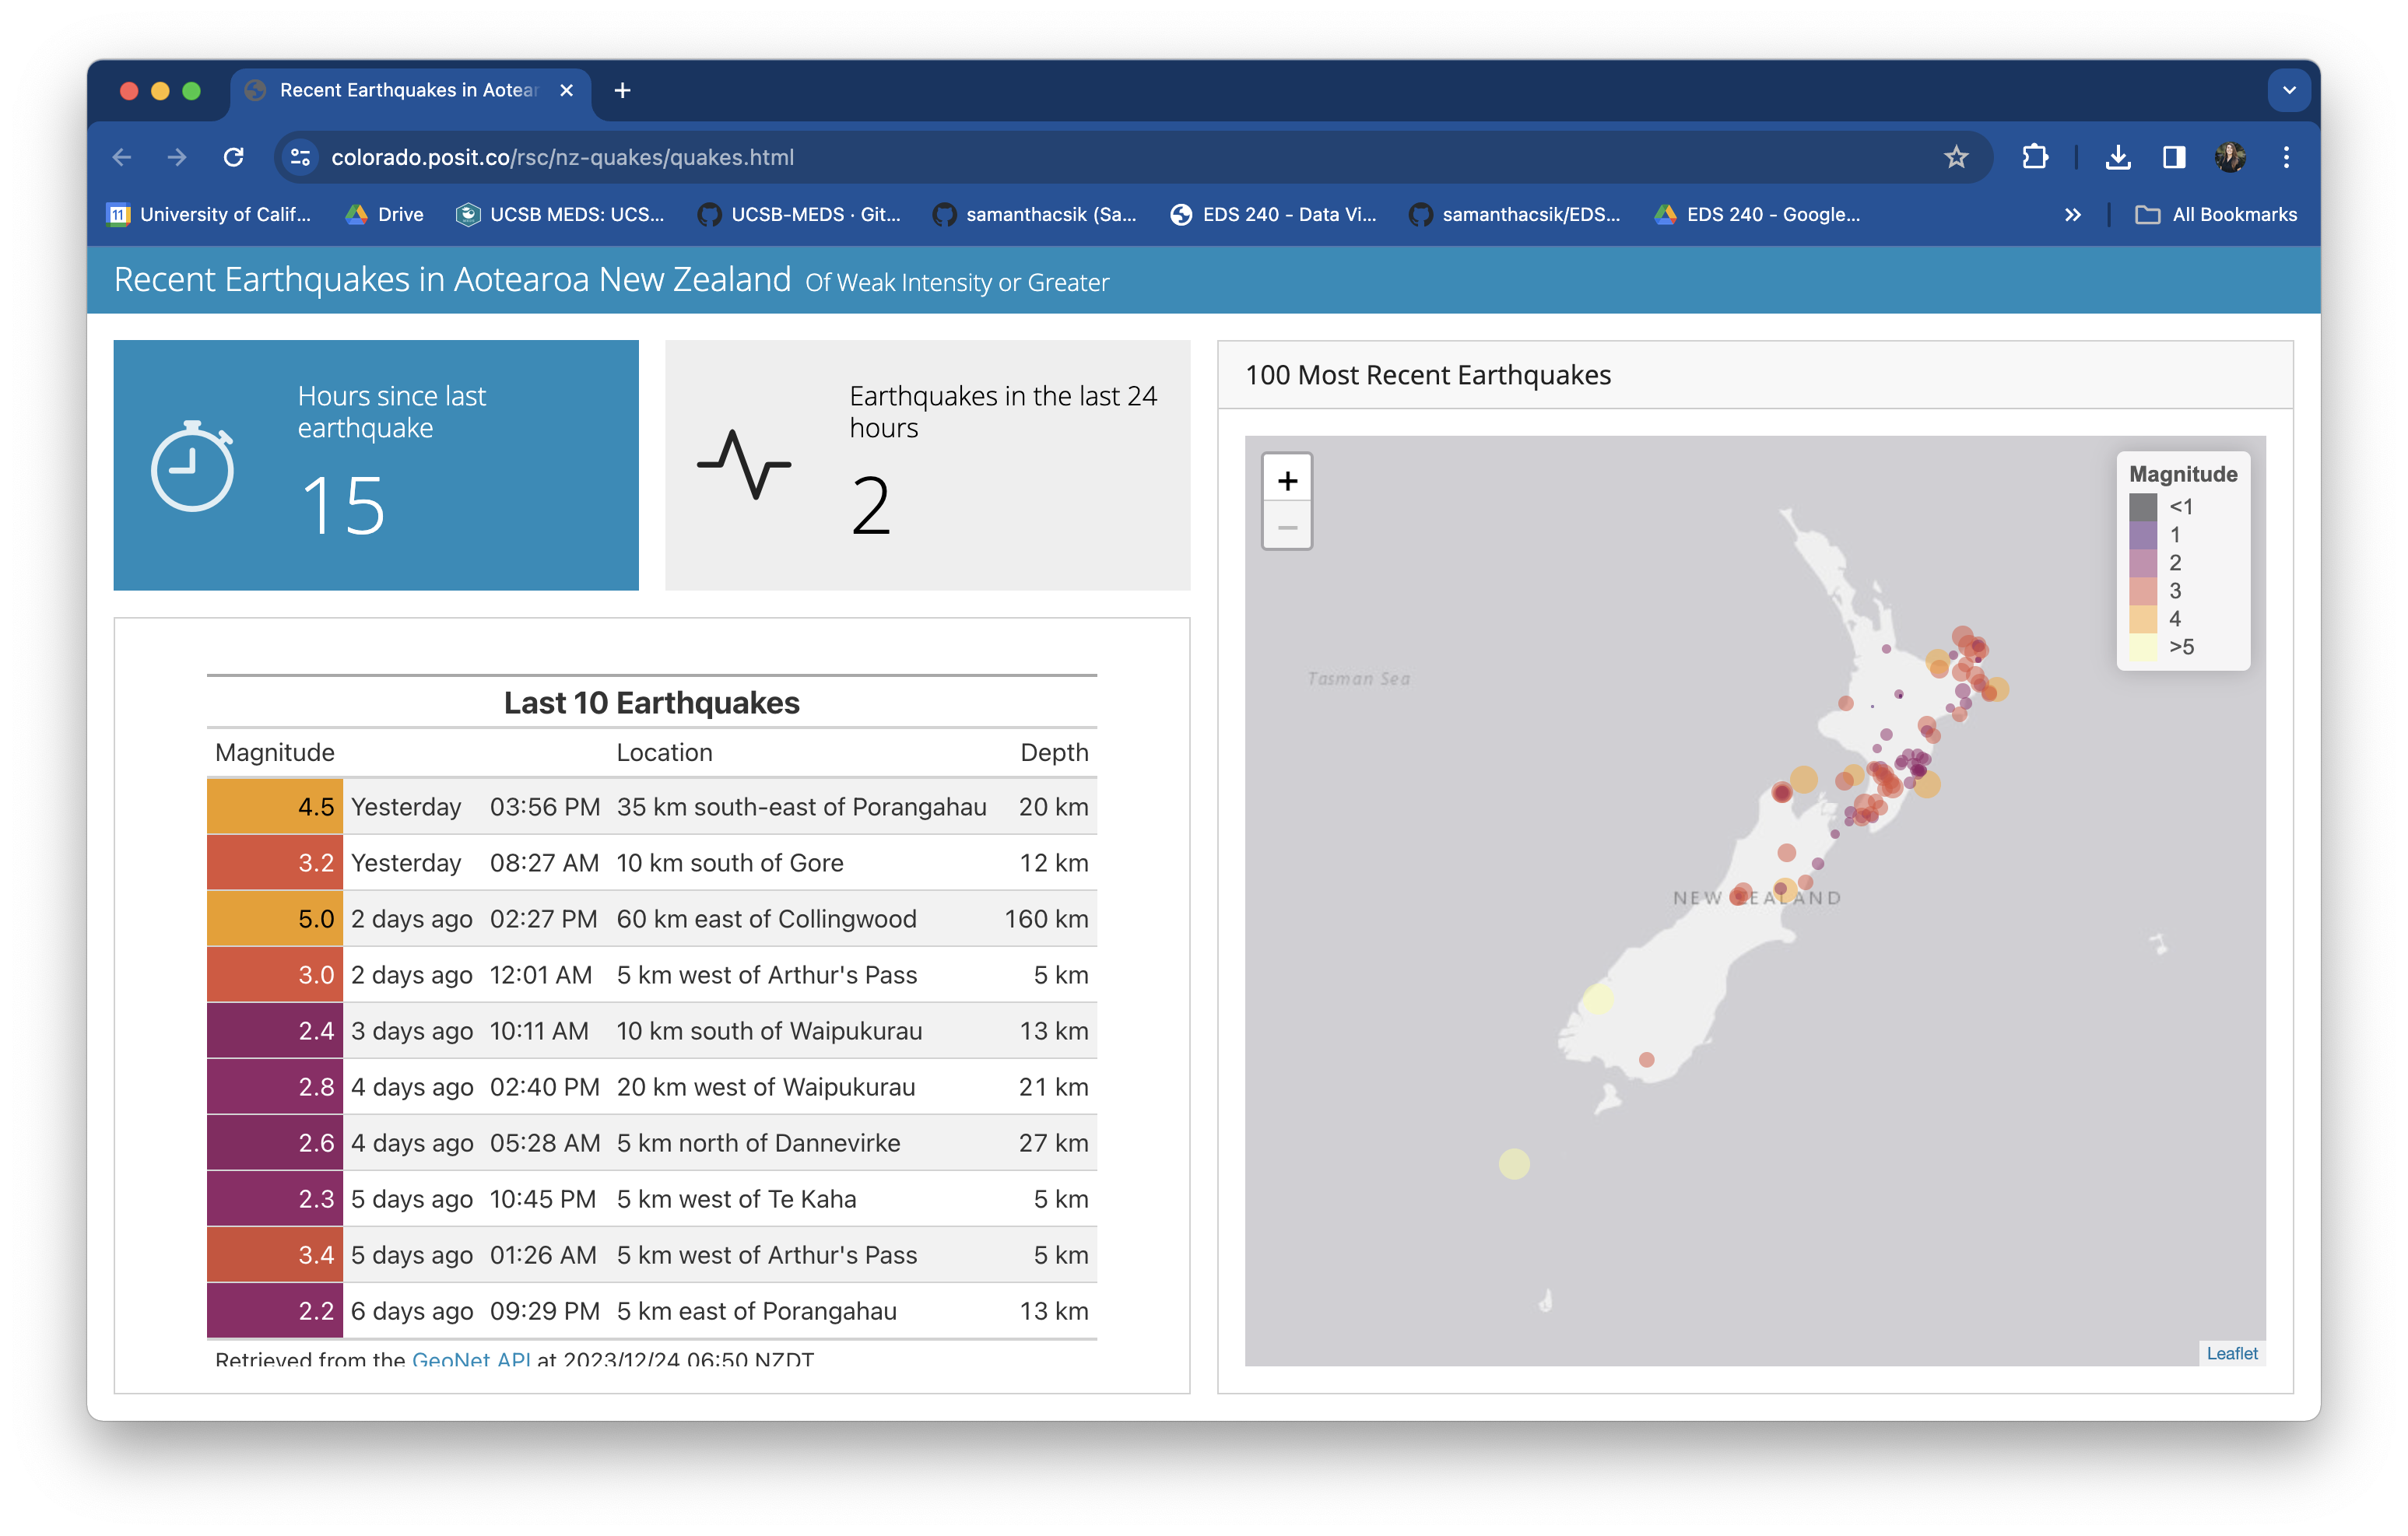
Recent Earthquakes in Aotearoa New Zealand (built using Quarto)
Embed reactive shiny components (e.g. a plot with sliders that control its inputs) in Quarto documents. By using some fun new code chunk options, you can instruct Quarto to spin up it’s own self-contained shiny server to run your reactives. Read the Quarto documentation to learn more and check out some teaching examples.

Old Faithful, which demonstrates incorporating an interactive plot into the main flow of a document. Source code
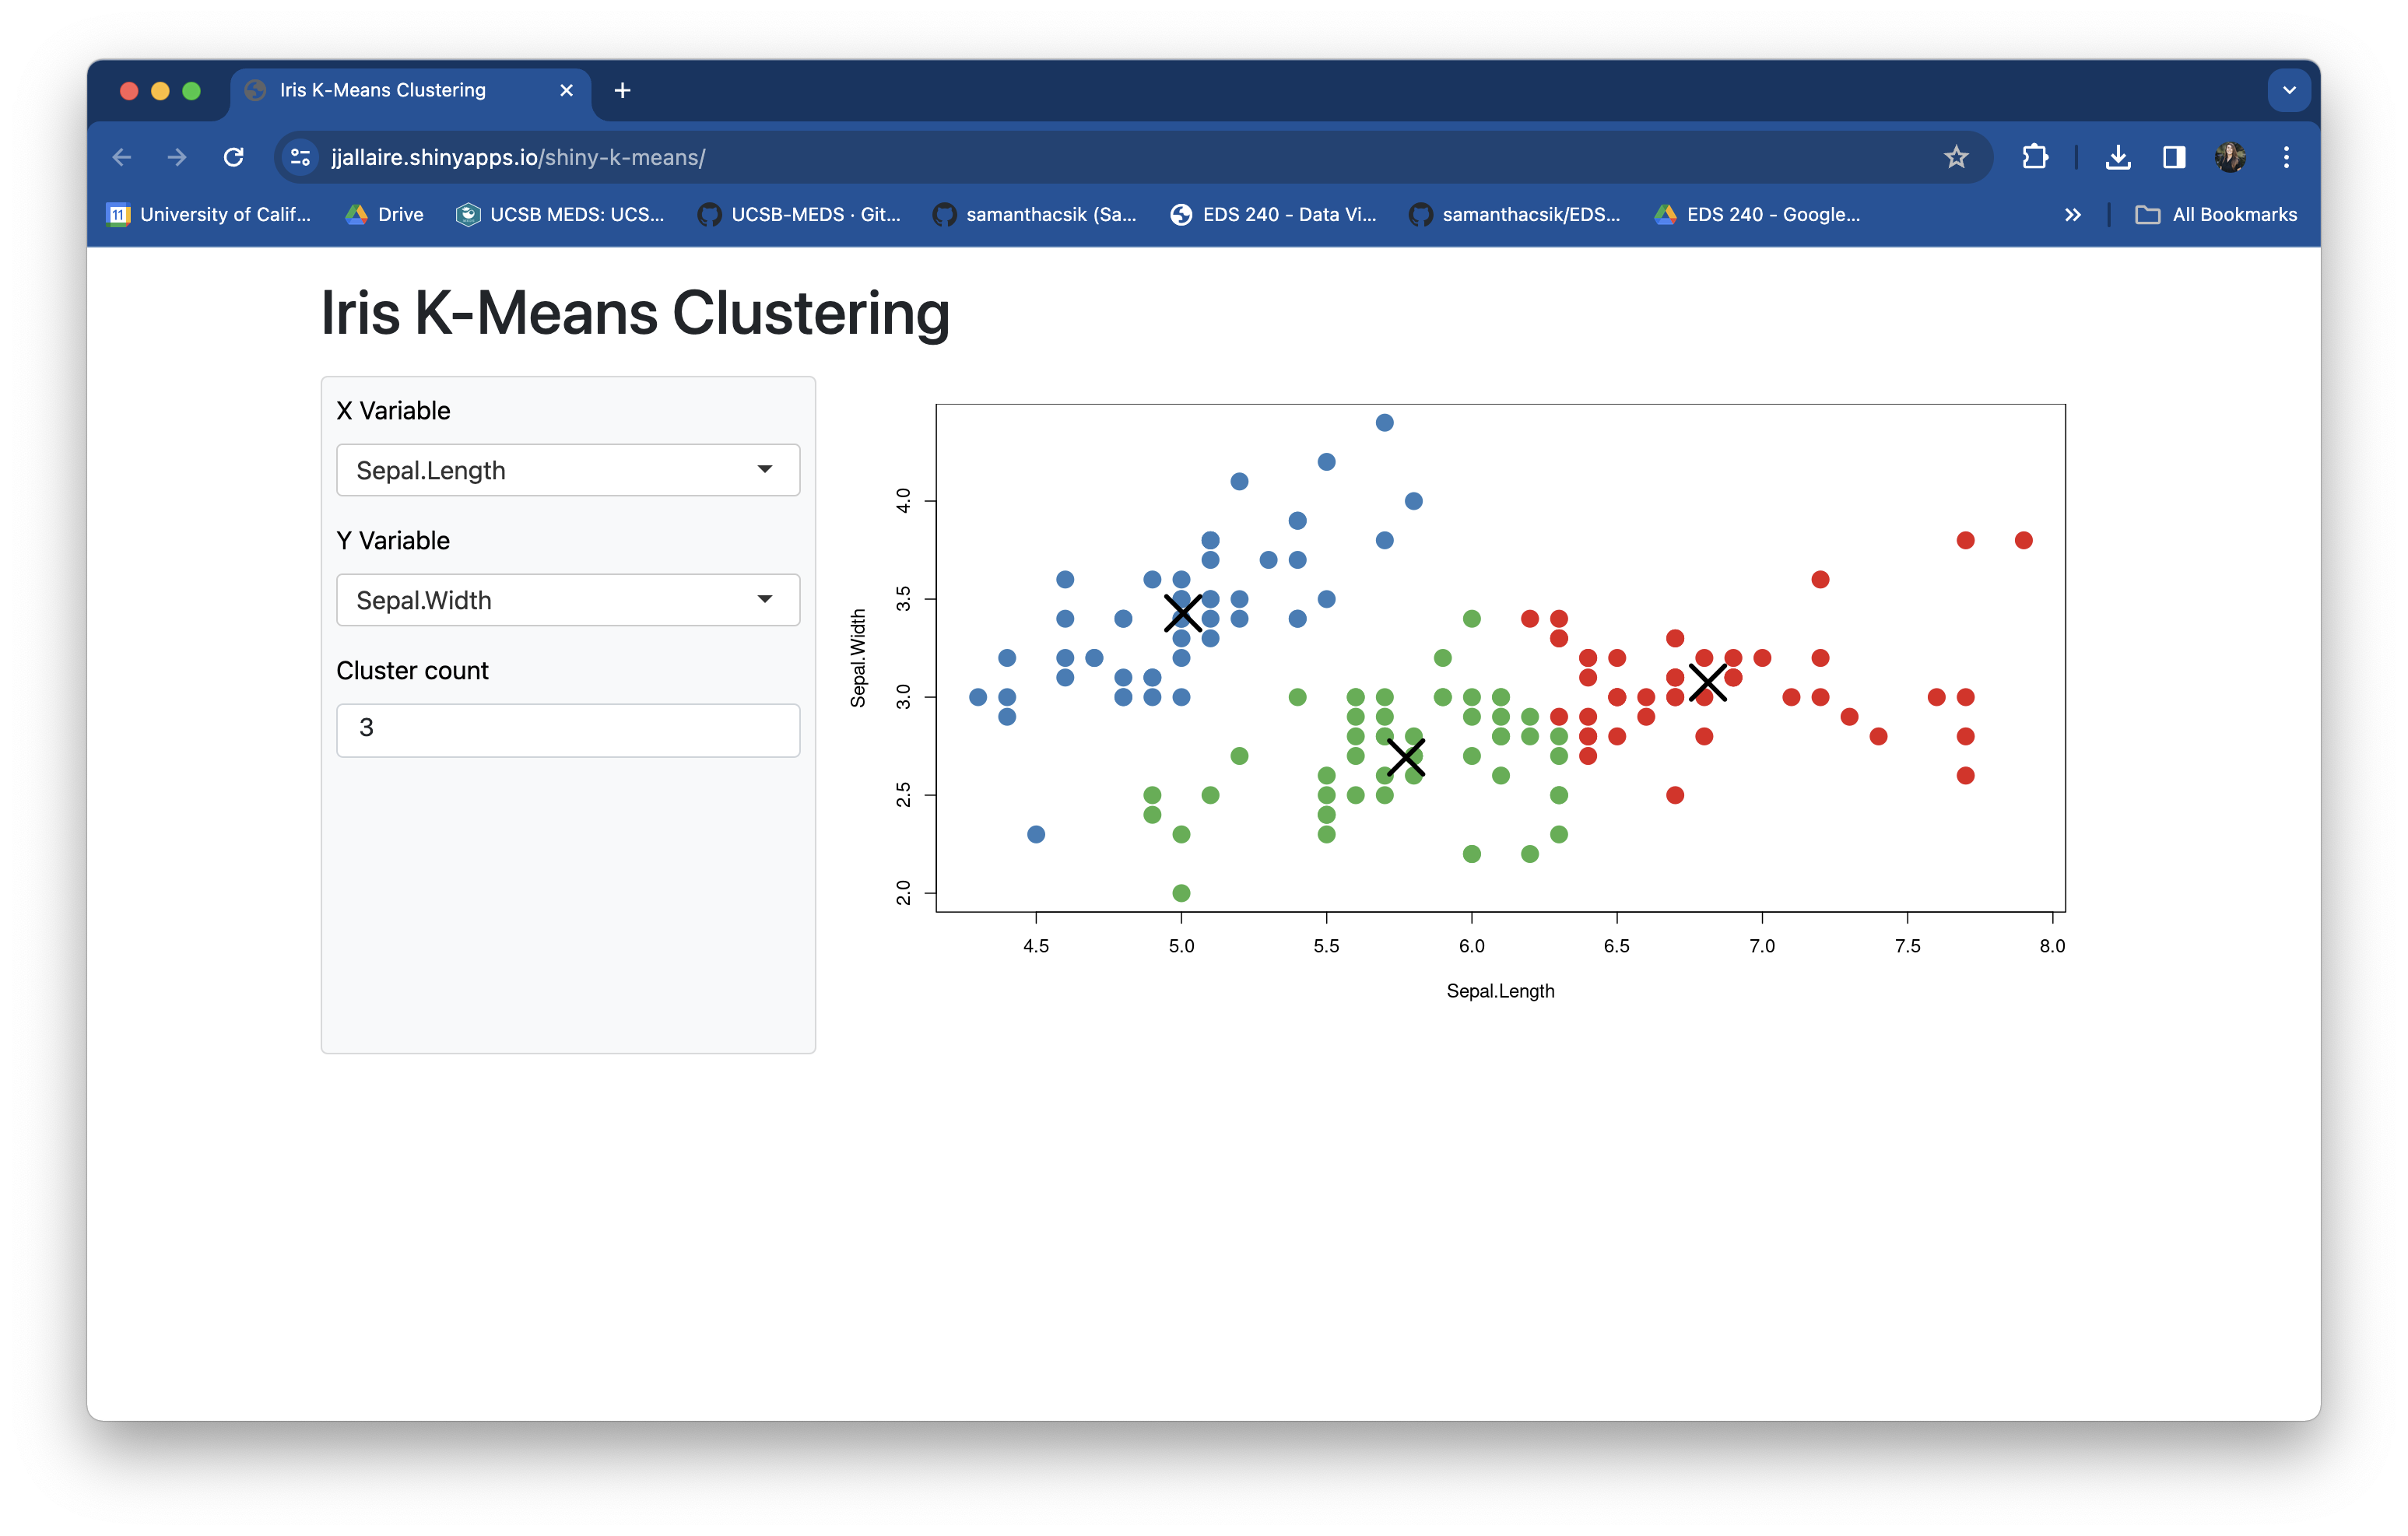
Iris K-Means Clustering, which demonstrates using a more “application-like” page layout (sidebar and main panel). Source code
Shinylive is a serverless version of Shiny, which was recently annoucned at posit::conf(2023) by Joe Cheng (rewatch his talk!). It supports Shiny for both R and Python (that’s right, you can build shiny apps using Python too! See Shiny for Python for more info). You have a few options:
{shinylive} package for R or {shinylive} package for Python
Image Source: Run a Shiny app in the browser with shinylive for R, by Veerle van Leemput
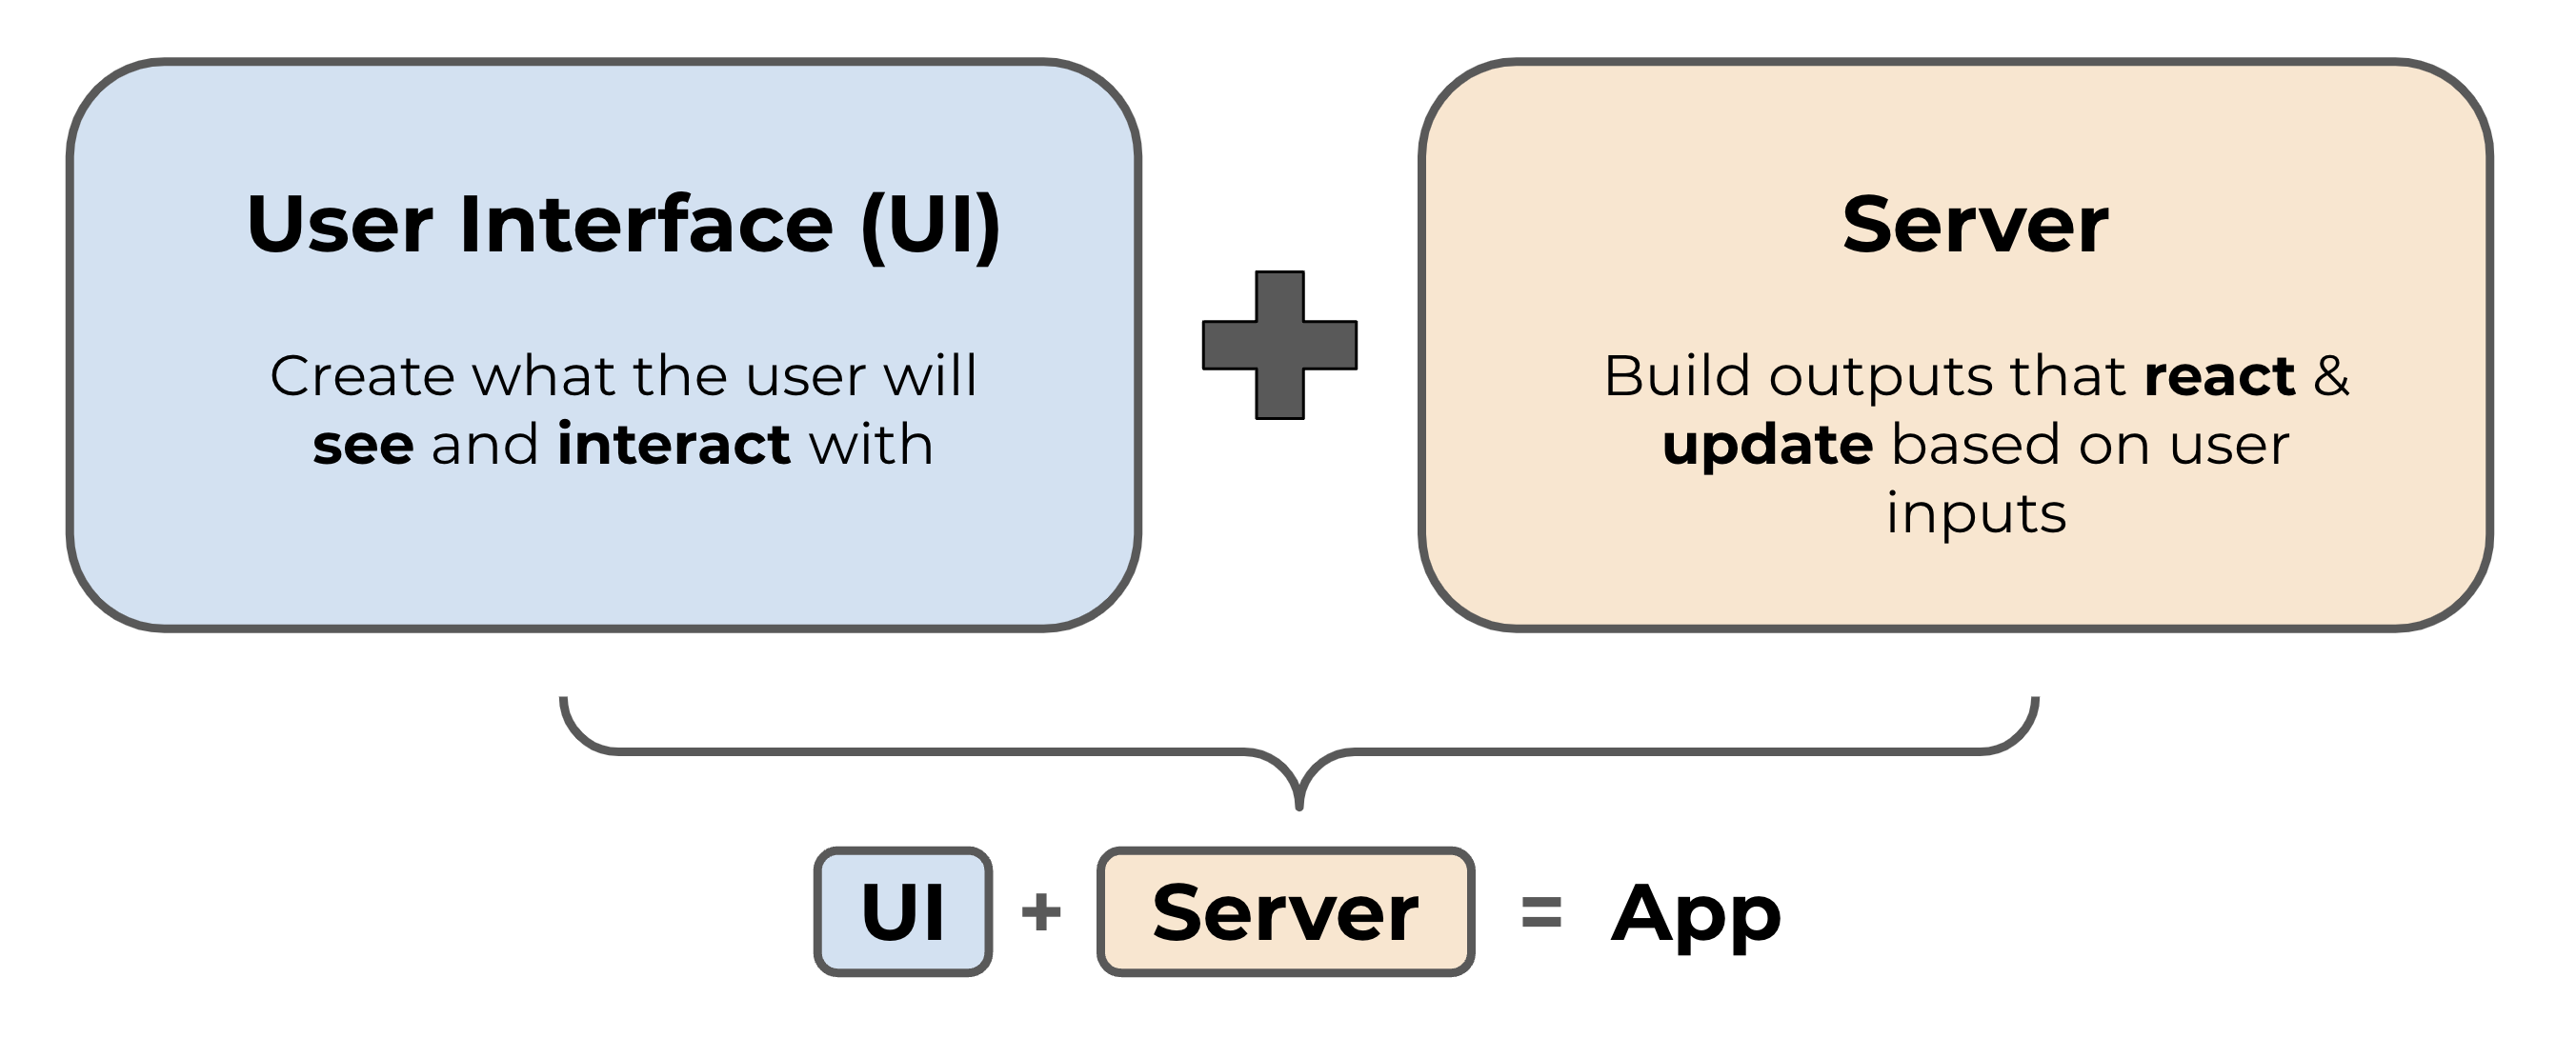
Shiny is an open source R package that provides a framework for building interactive web apps without having to know HTML / CSS/ JavaScript.
Apps made up of a UI (which controls the layout / appearance; the part a user sees / interacts with) and a Server (which handles the logic)
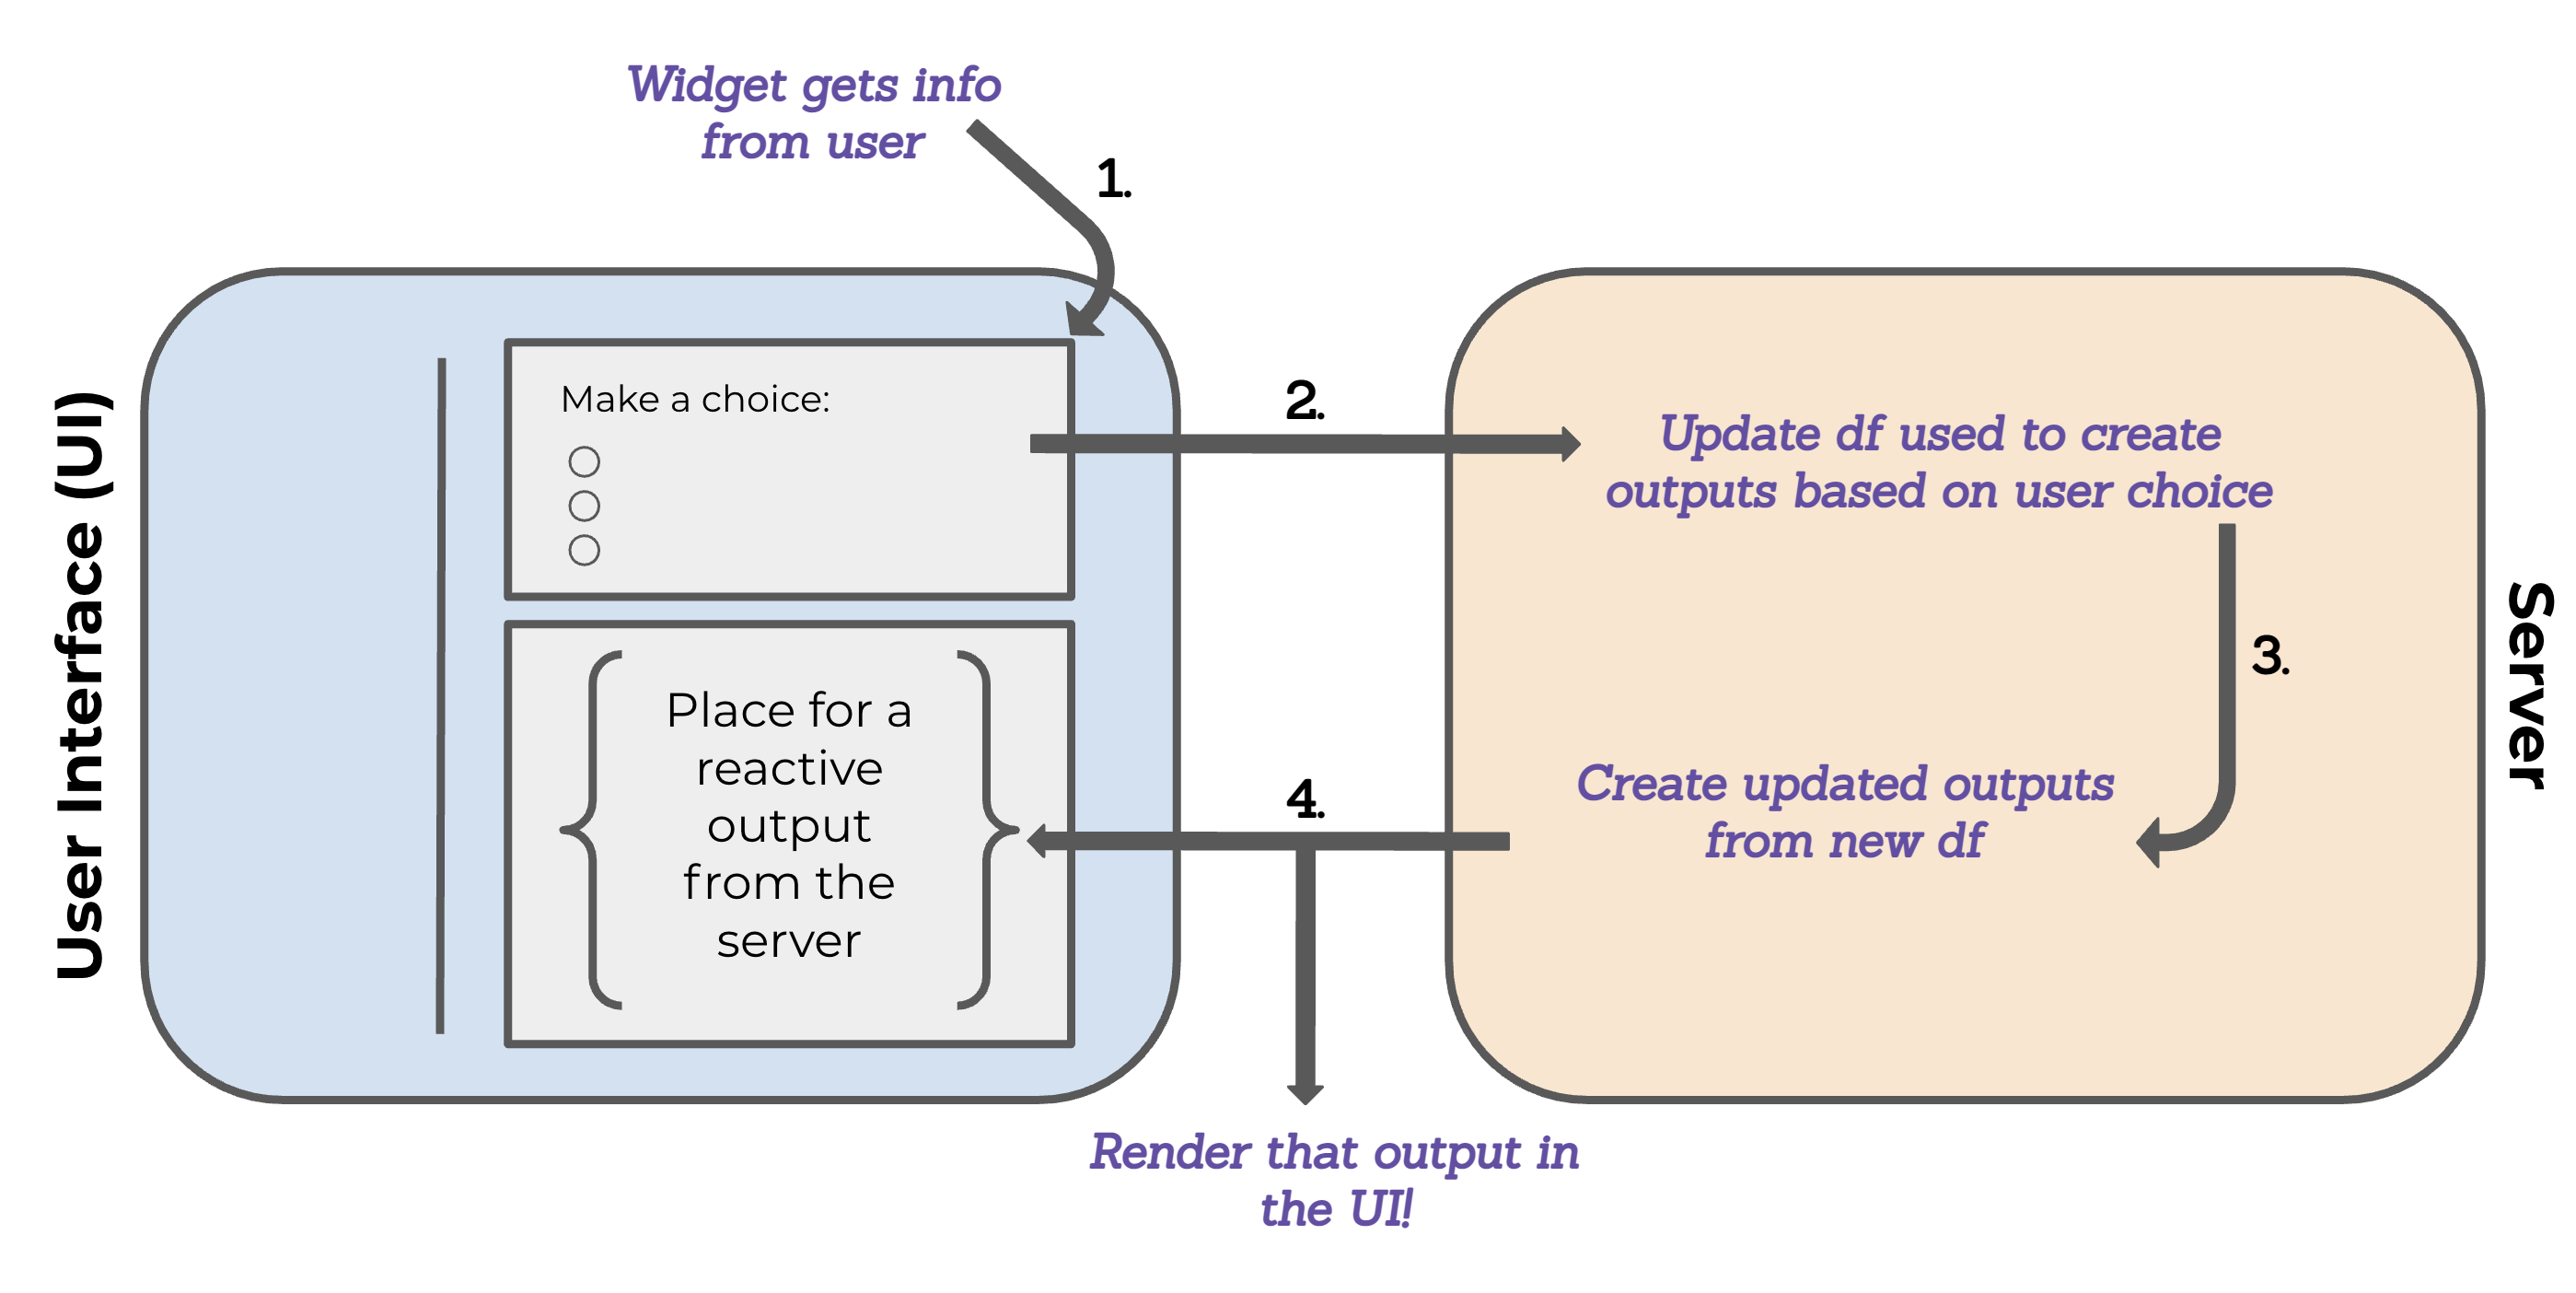
Reactivity = a user updates values via widgets in the UI server performs some logic to return an updated output output is rendered in the UI
We can create apps using either a single-file, (app.R) or two files (ui.R + server.R). A single-file setup are great for building small apps, and especially great for building reprexes. A two-file setup is best for larger apps (and likely what you’ll want to opt for).
You can optionally use a global.R file to store objects that are used across your app (libraries, data, etc.).
How you organize the visual structure of your app’s UI can affect not only how aesthetically-pleasing it is, but also how users will interact with it. {shiny} includes a number of layout functions, or use {shinydashboard} to access additional functions for creating classic “dashboard-style” layouts.
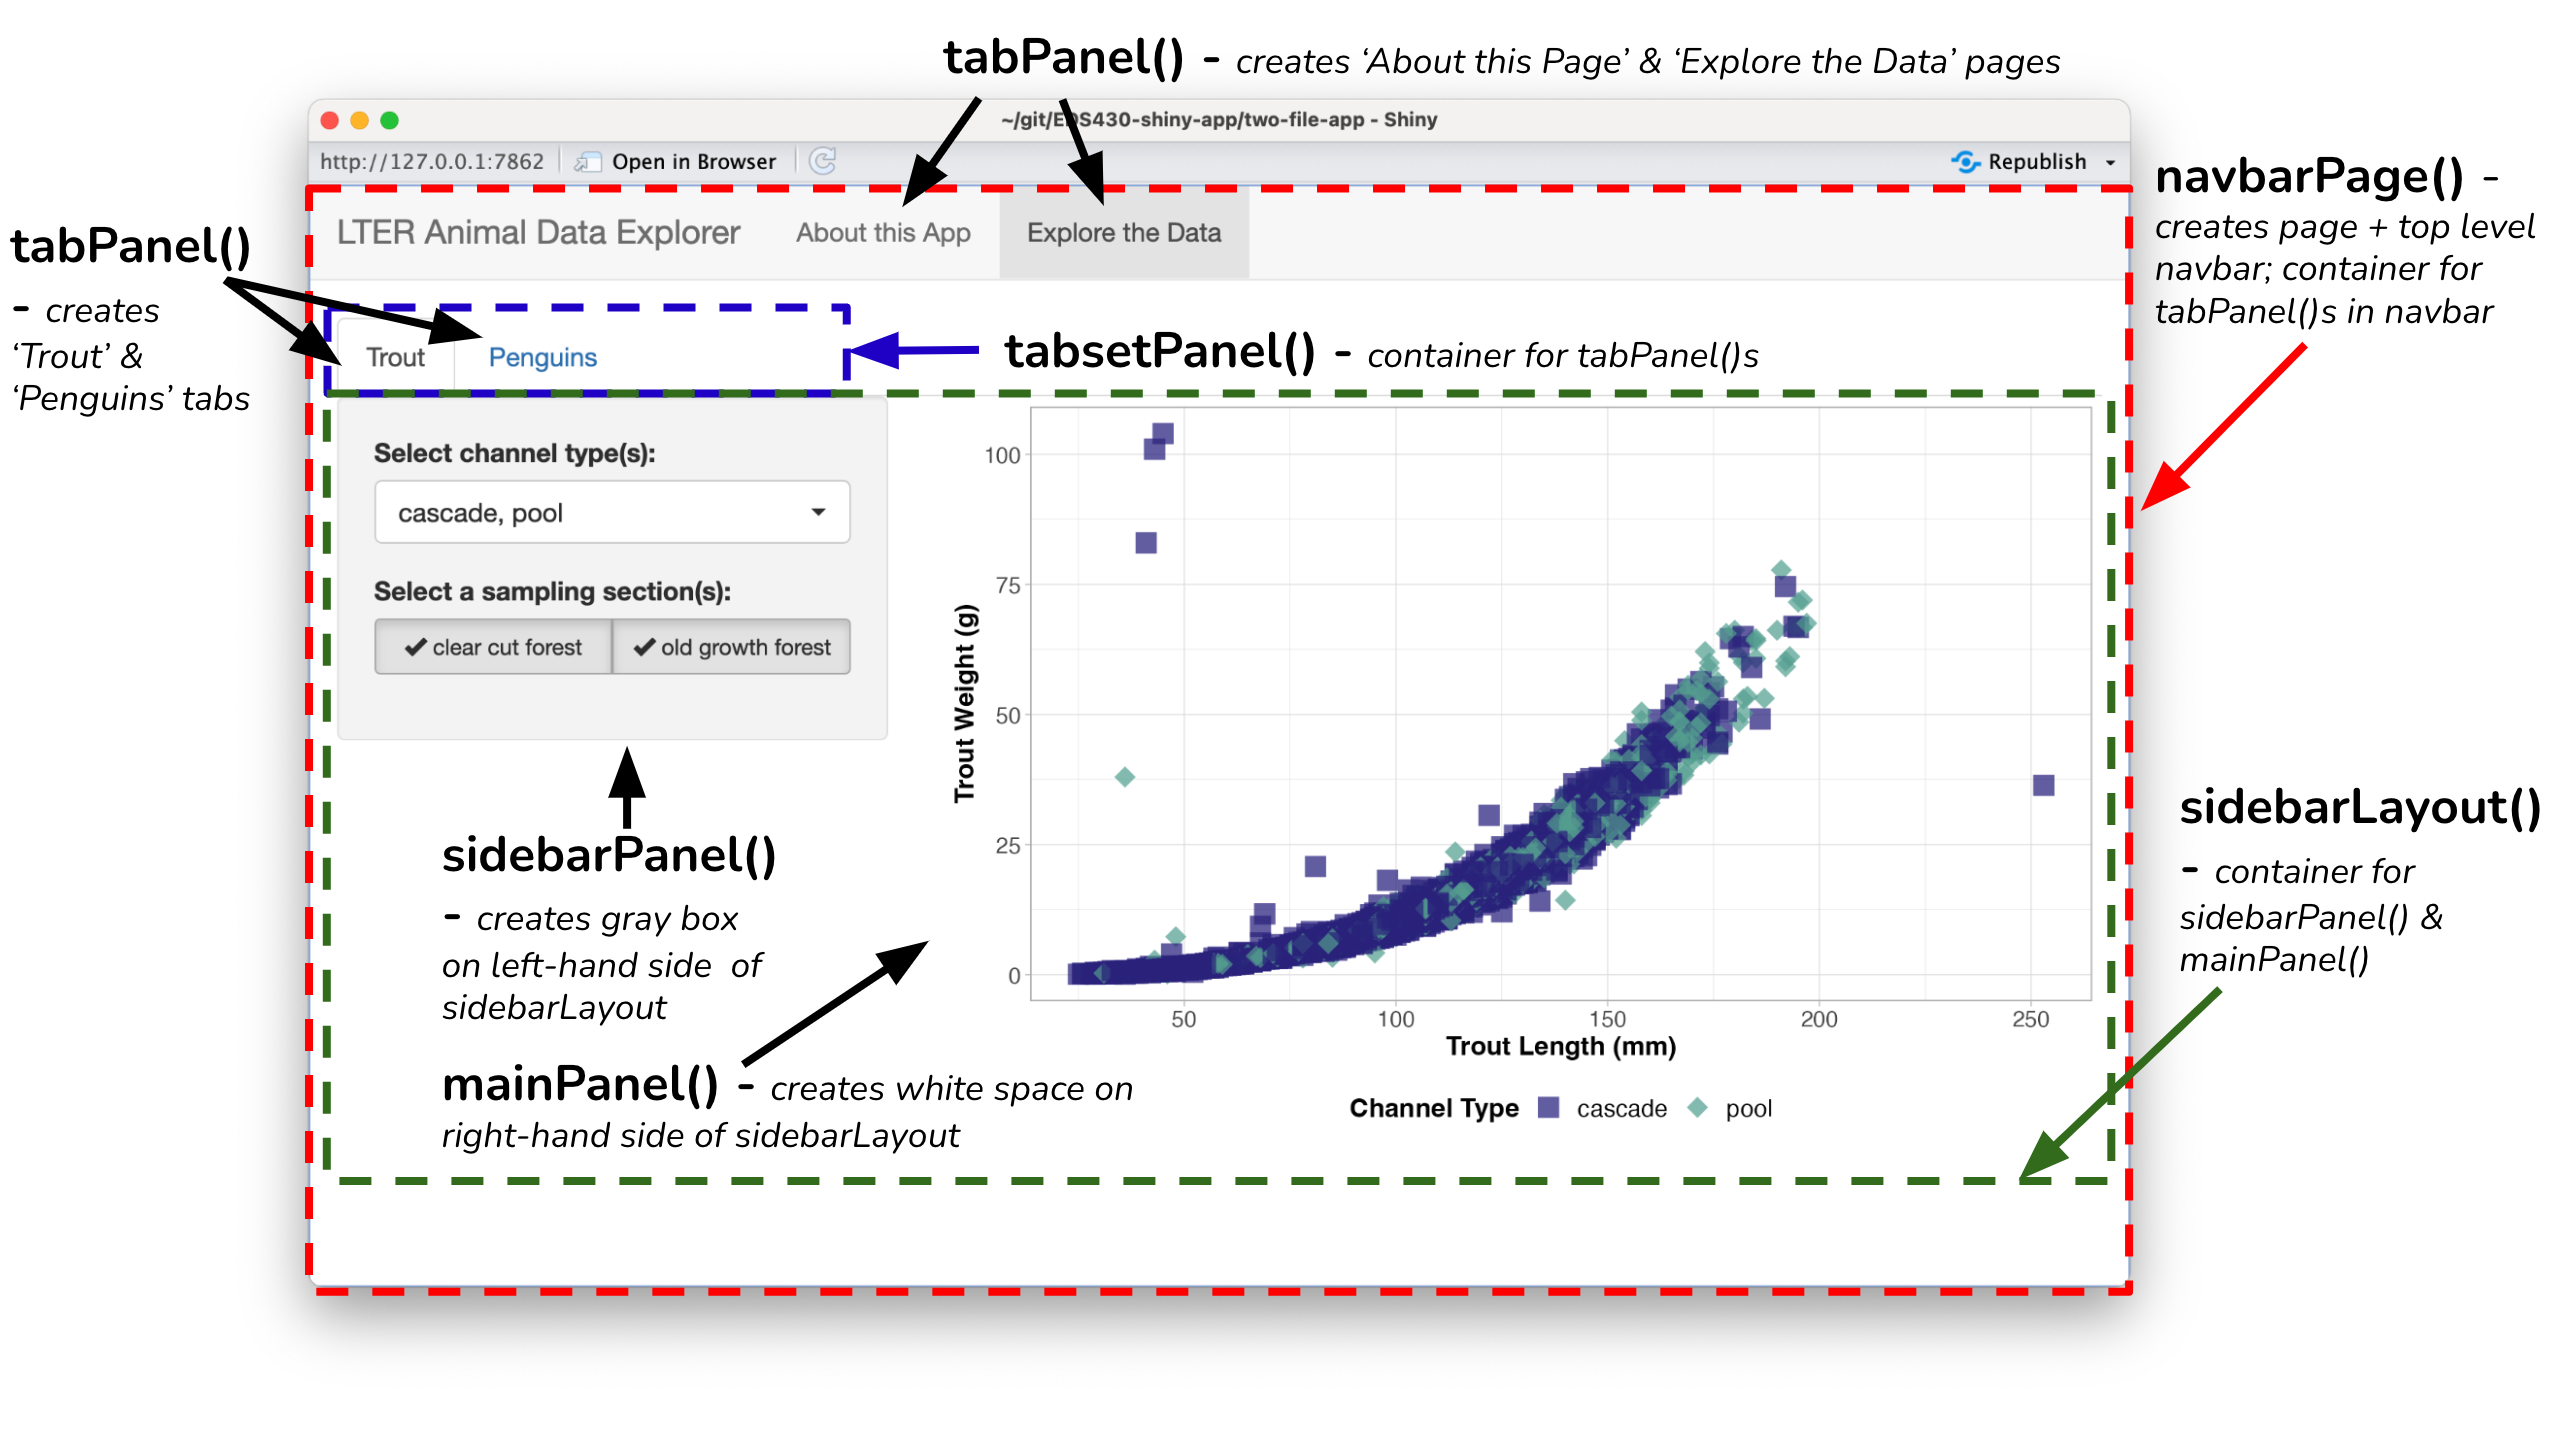
It’s easy to lose track of parentheses when using lots of layout functions. Remember to use rainbow parentheses, code comments, and appropriate spacing between lines to stay organized.
There are a number of ways to deploy a shiny app, but stick with shinyapps.io whenever possible – it’s the quickest and fastest way to securely host your app. The free tier allows you to host 5 apps with up to 25 active hours a month, however it’s easily scalable with a number of paid plan options.
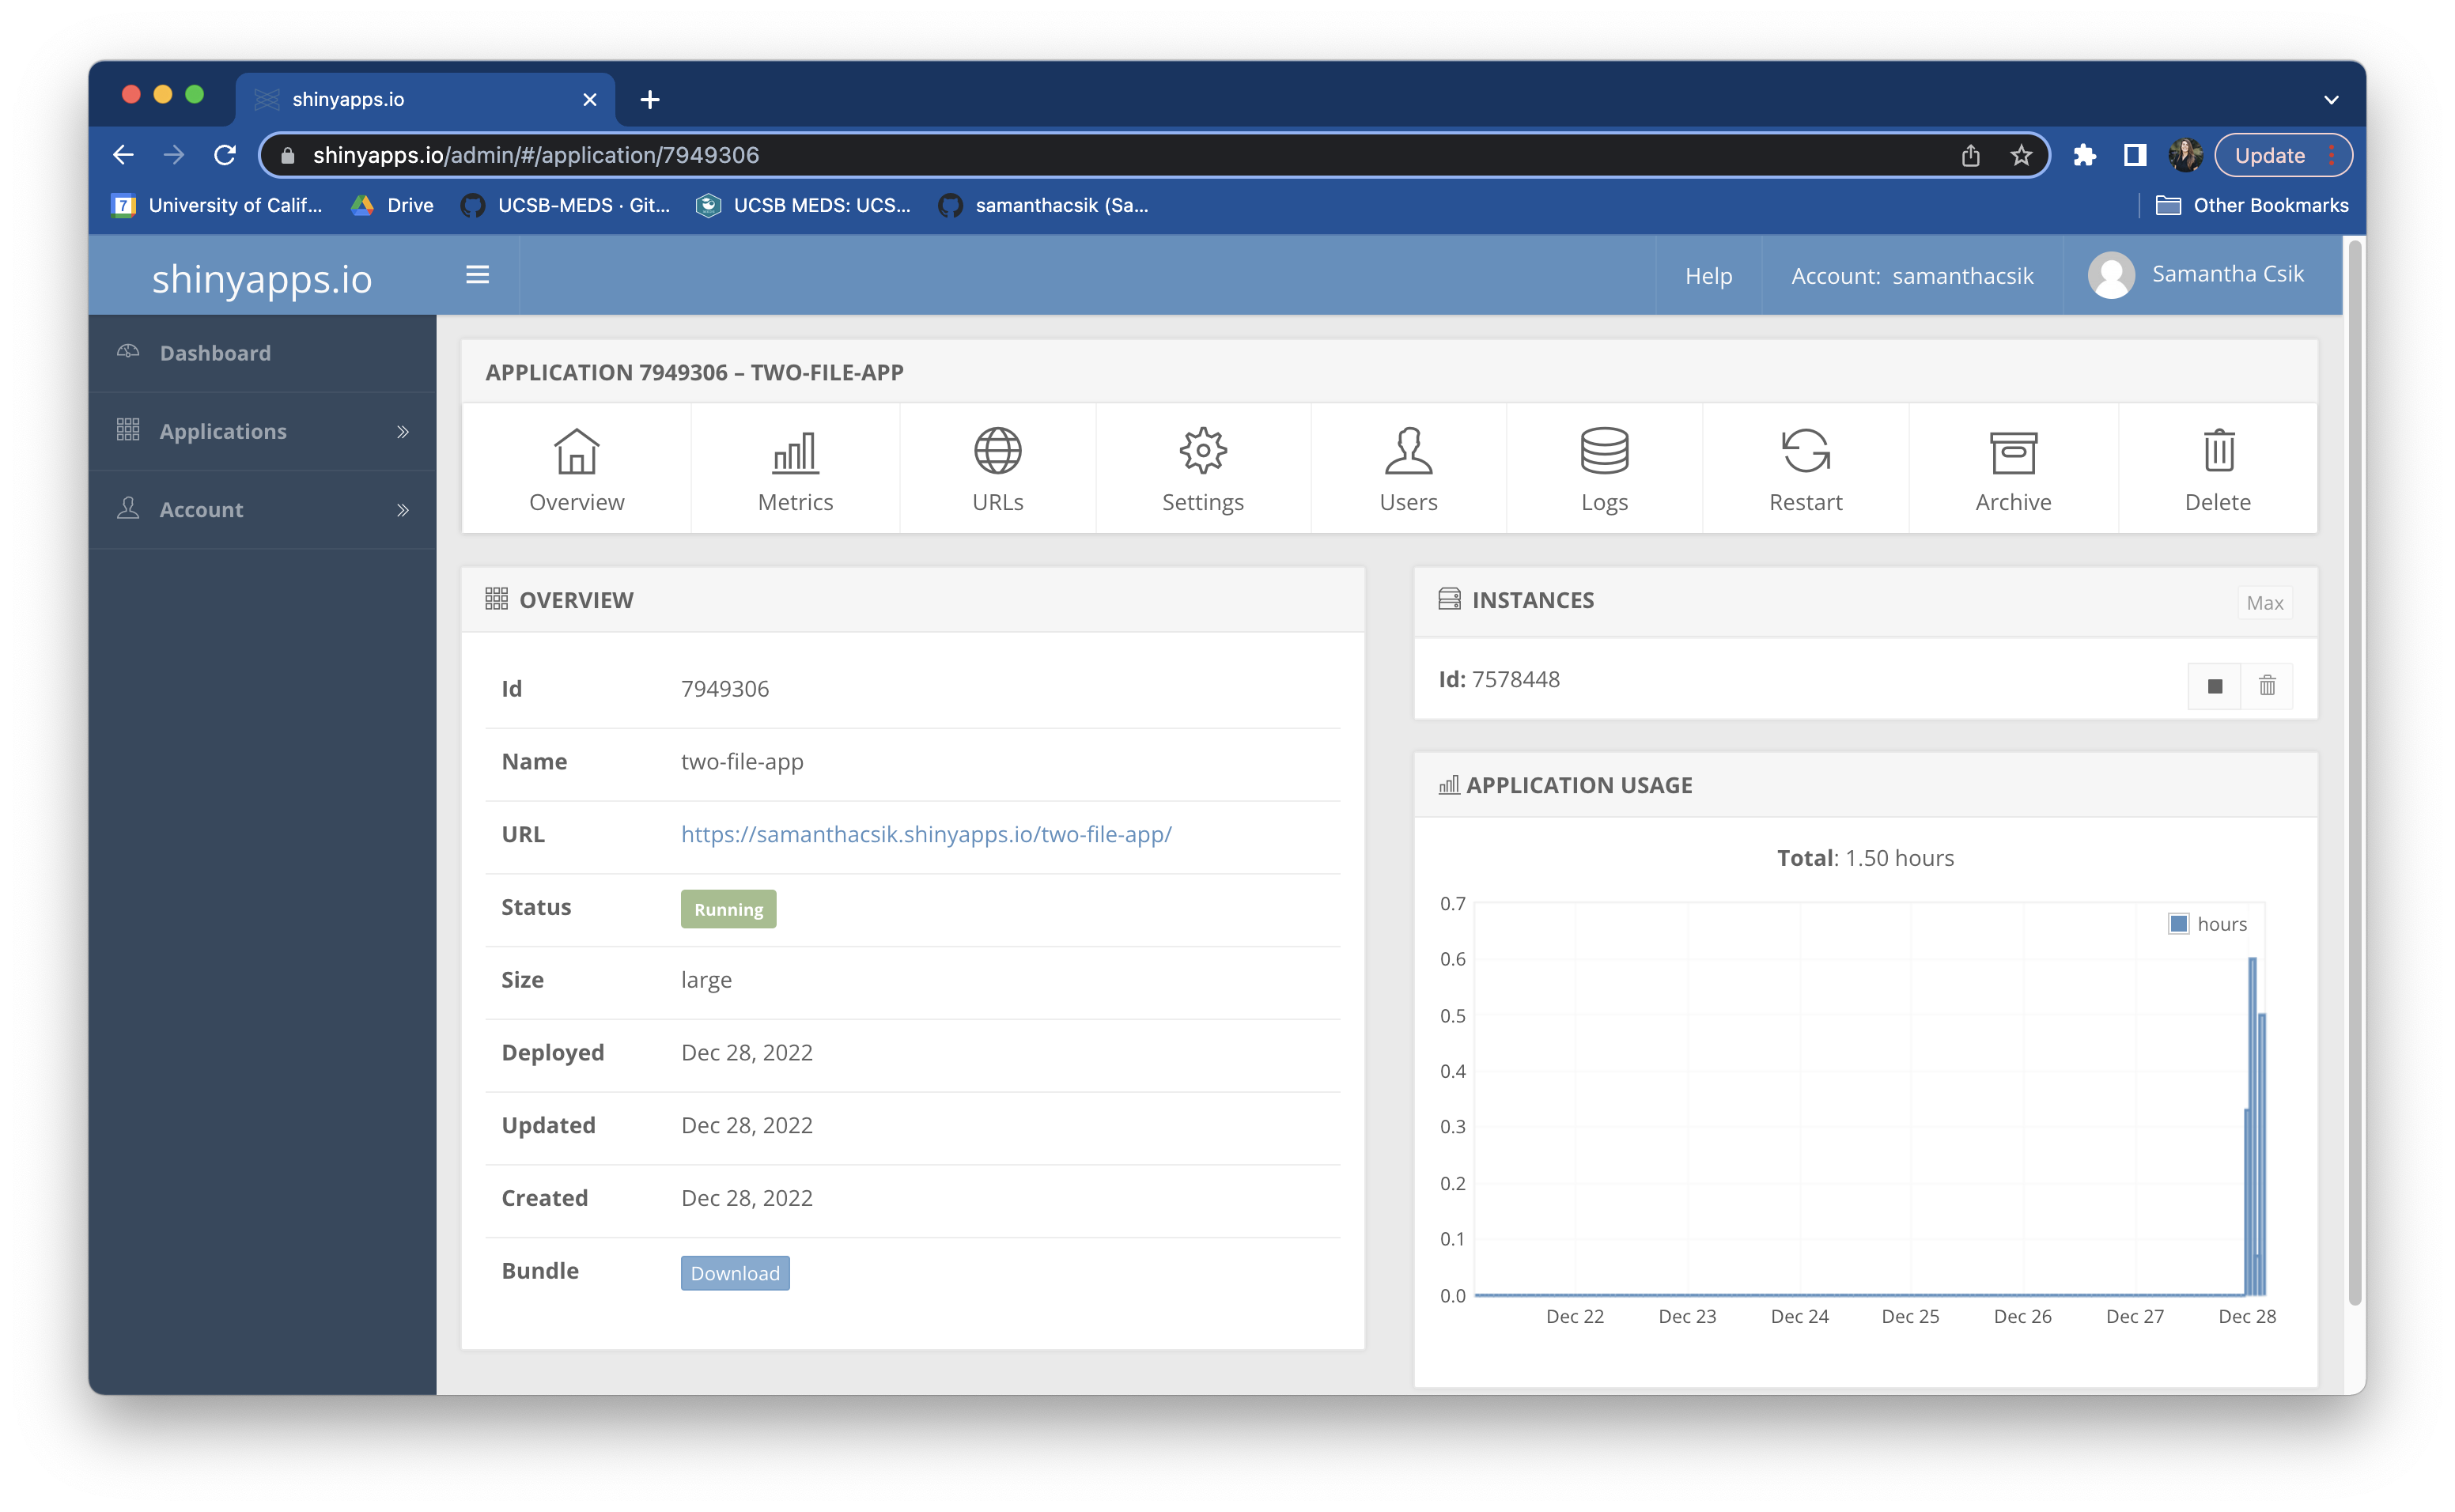
The shinyapps.io dashboard
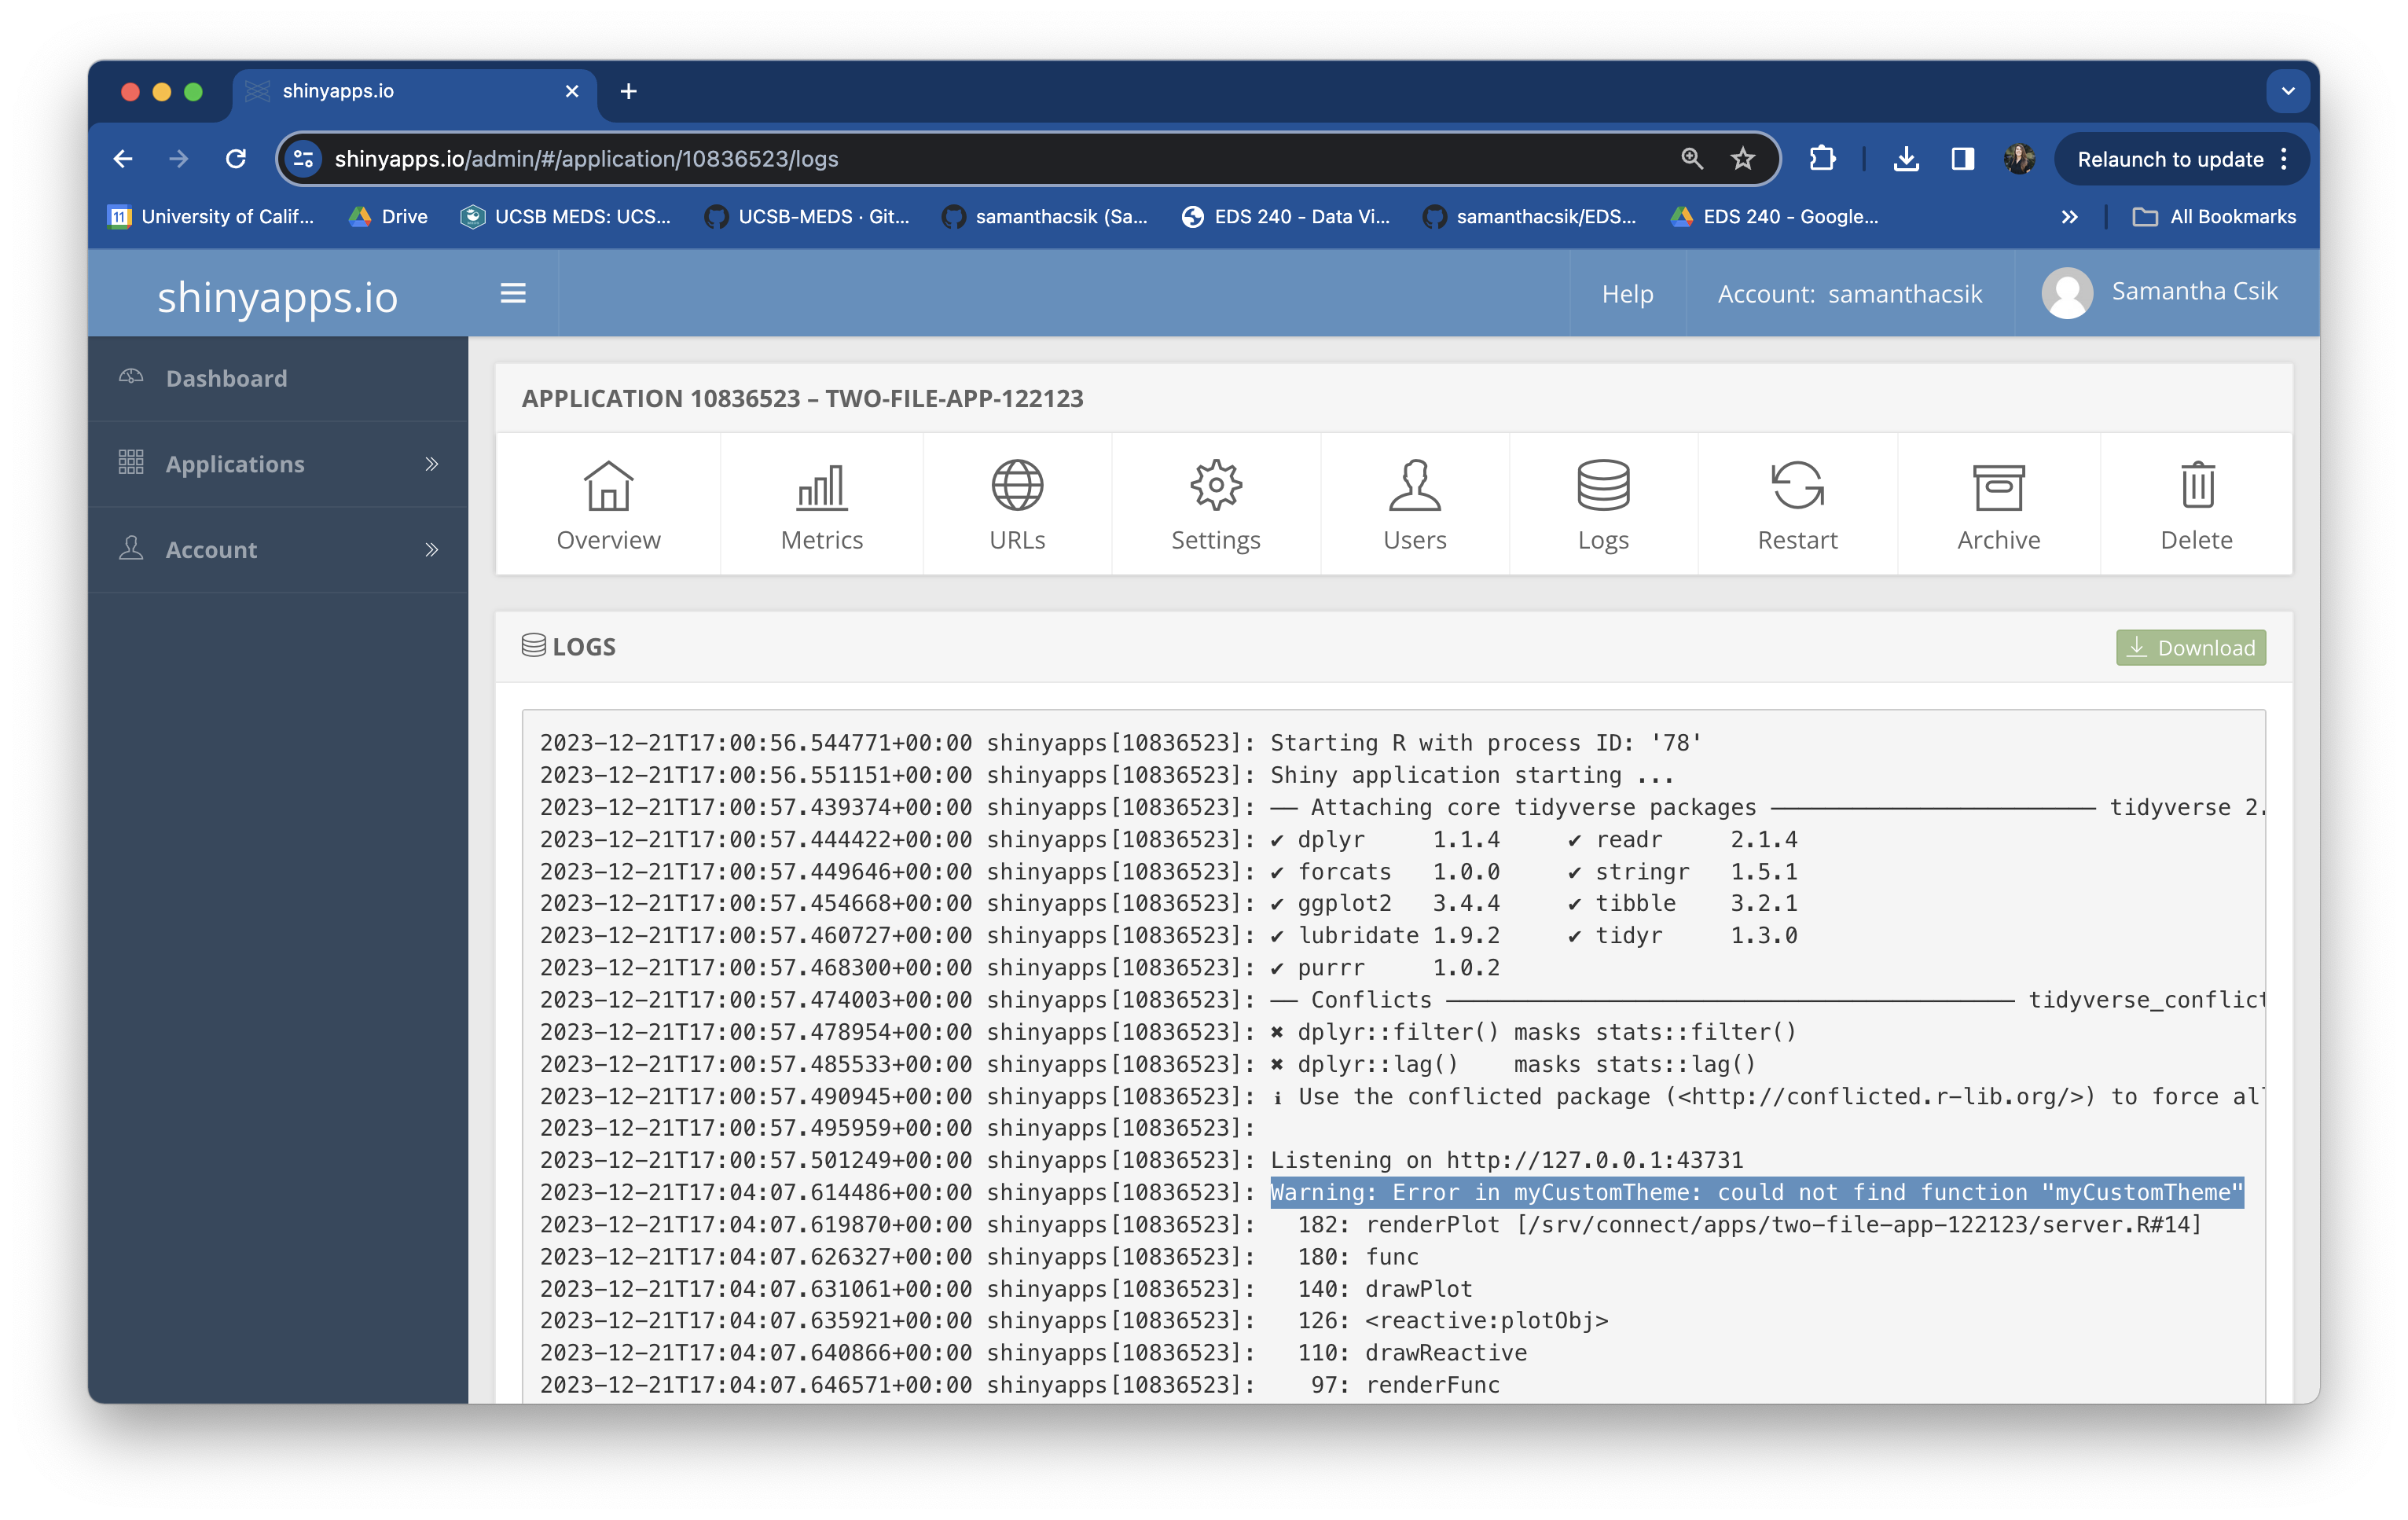
A deployment log on shinyapps.io
The shinyapps.io dashboard provides lots of helpful information, particularly the deployment log – remember to check here for information about failed deployments.
{bslib} and {fresh} provide user-friendly functions for automatically generating and applying CSS styles to update update colors & fonts across your app.
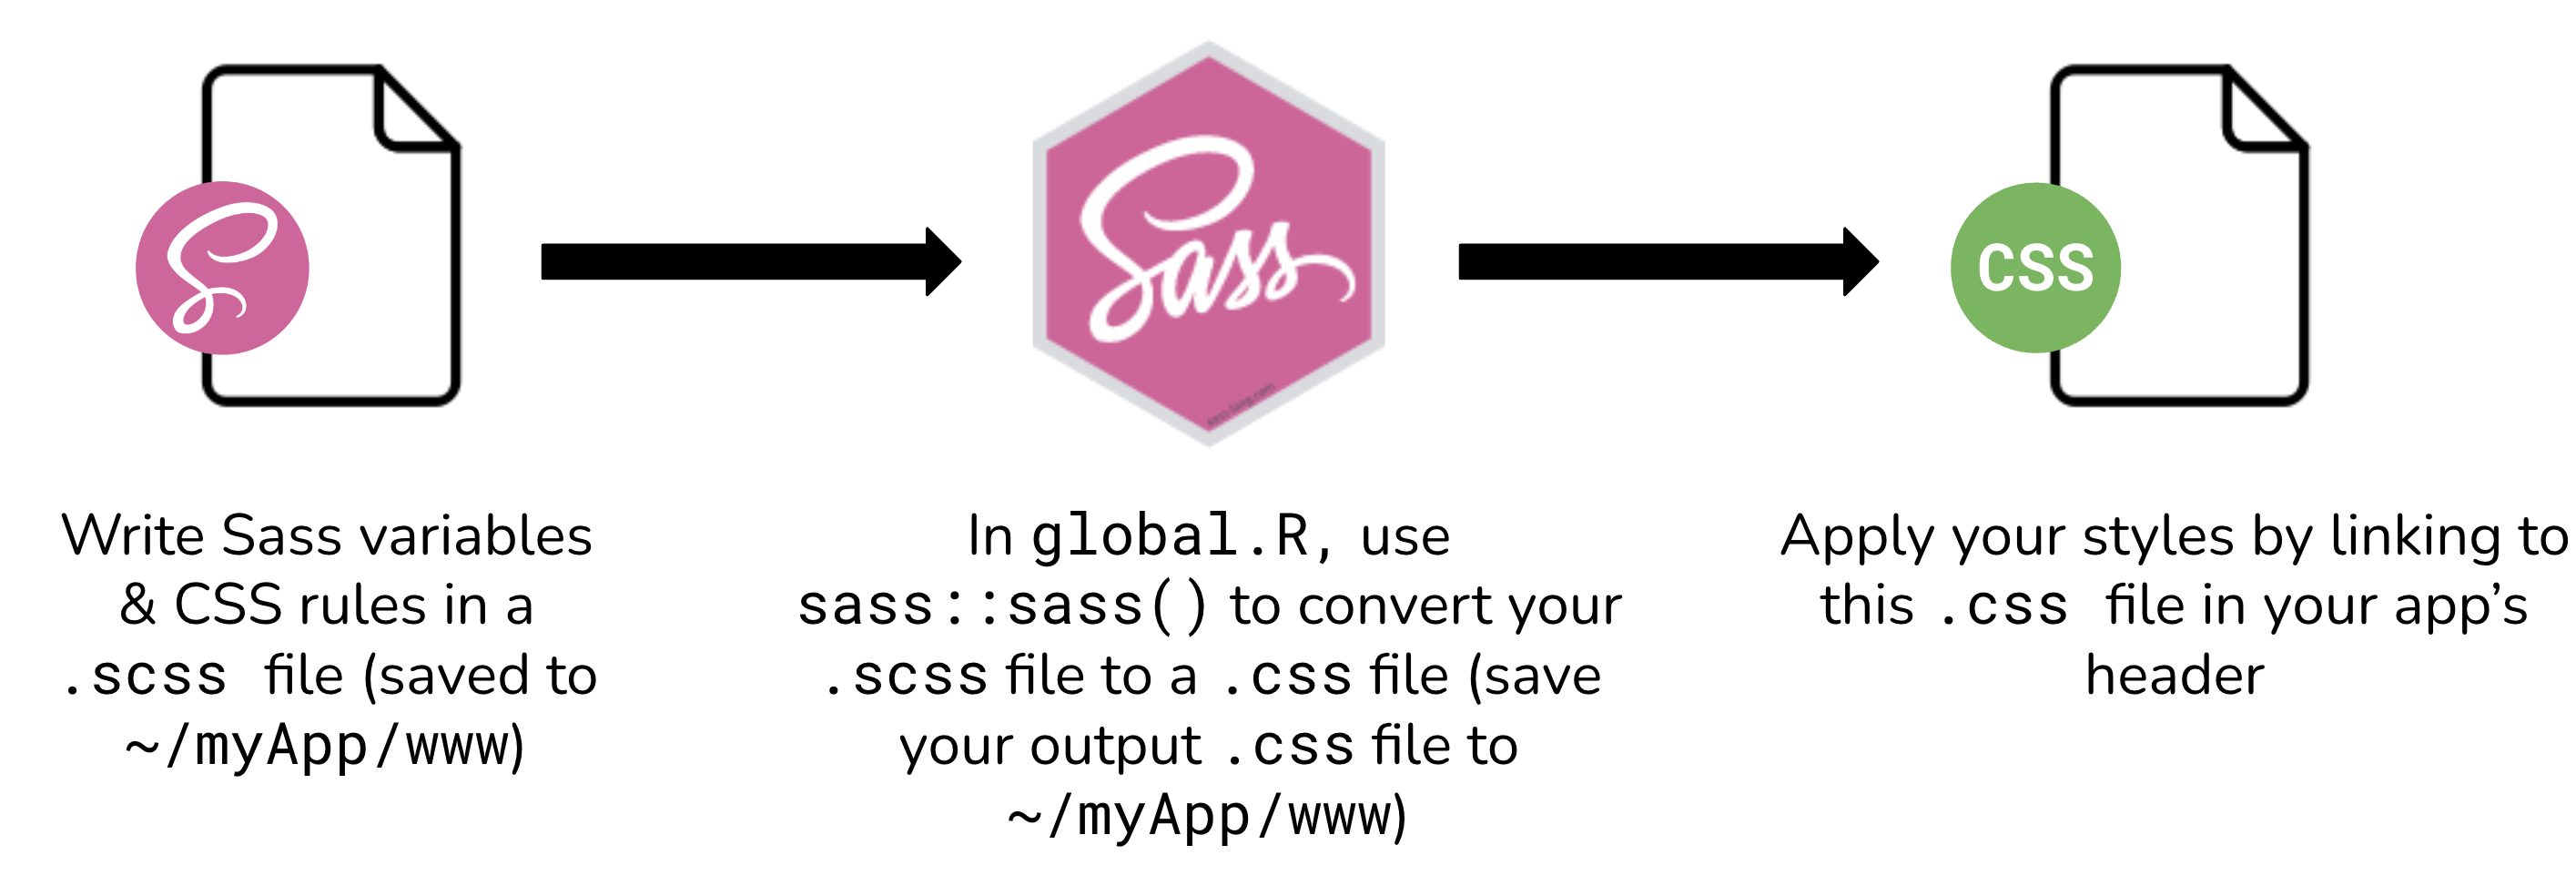
Alternatively, write your own Sass (.scss) file to fully customize your app’s appearance. Use the {sass} package to compile it to CSS and link the resulting .css file in your app’s header.
This is a Quarto Presentation. To learn more, visit https://quarto.org.
If you see mistakes or want to suggest changes, please create an issue on the source repository.